Author Archives: Jessica Snell

Grow Your Own Veggies Guide

Grow Your Own Vegetables

Growing your own fresh vegetables is such a rewarding process. If you are a beginner, it can seem overwhelming at first but the best way to learn is to try! If you are a seasoned gardener there is always something new to learn or a new challenge.

Plan the Garden & Select a Site

Growing vegetables requires a lot of light and good soil. Sometime we are limited by our space but don’t give up as you can grow in containers or raised gardens. Choose an area that receives at minimum 6 hours of sunlight a day, is well draining and is near a water source. Start small and expand when ready, a great starter size is 50-75 sq feet. Be realistic and select vegetables that you and your family enjoy eating.

What to Grow

In Maryland we have “cool-season” veggies that grow in early spring (i.e., lettuce, spinach, root veggies) and “warm-season” veggies that aren’t planted until the soil warms up (i.e., tomatoes, peppers).  Cool season vegetables can handle air temperatures as cool as 40 degrees, typically they are planted 2-4 weeks before the average last frost date. Warm season crops need the air temperature above 50 degrees and grow best when air is 75 degrees or above.

Top 10 Easy Vegetables

  1. Lettuce (cool season)
  2. Green Beans (warm season)
  3. Radishes (cool season)
  4. Tomatoes (warm season) Bush & Cherry types are the easiest
  5. Zucchini (warm season)
  6. Peppers (warm season)
  7. Beets (cool season)
  8. Cucumbers (warm season)
  9. Chard, Spinach, Kale (cool season)
  10. Peas (cool season)

Prepare your soil and plant

Remove any sod and dig in at least 2” of compost our favorite is Bumper Crop.  Not only does compost add nutrients that the plants will need, it also retains moisture longer than topsoil. It’s always a good idea to test your soil so you know the nutrient and PH levels. If gardening by seed be sure to plan ahead according to seed packets, while seed starts can be purchased when you are ready to plant. Follow planting guide lines for seeds, our Botanical Interest seed packets have great detail on the inside of the seed packet (some even have recipes!). If planting seed starts make sure you harden them off before planting. When planting tomatoes they can be planted extra deep, up to their first set of leaves. Other vegetables should be planted at the same depth as their pot. All vegetable starts benefit from the soil being dug twice the width of their root-ball and then incorporating a handful of compost and an application of Tomato-Tone around them.


Caring for your Garden

  • Water deeply around the base of your vegetable plants, as necessary, to keep the roots systems moist. Frequent, shallow watering is good only for newly planted seeds—not mature plants.
  • Water in the morning when possible. Use a soaker hose or drip irrigation system to reduce water use.
  • Fertilize as necessary based on your soil test recommendations.
    • Tomatoes are heavy feeders and benefit from multiple applications of Tomato-Tone.
  • Control weeds by laying down organic mulches, slicing or chopping weeds with a hoe, and hand-pulling. Start early, as soon as weeds appear.
  • Support tomato, pepper, and cucumber plants with stakes or trellises to save space.
  • Monitor plants regularly for problems

Enjoy the Harvest

Growing Onions

Onions can be started from seed or you can get a jump start by planting onion sets. Onion sets are a miniature bulb which will grow into a nice large onion.
Generally we stock Red Onions, Yellow Onions, White onions and  Shallots in stock.
  • Select a location with full sun where your onions won’t be shaded by other plants.
  • Soil needs to be well-drained, loose, and rich in nitrogen; compact soil affects bulb development.
  • Till in aged compost or fertilizer before planting. Onions are heavy feeders and need constant nourishment to produce big bulbs.Bumper crop compost and Bio-tone fertilizer is our favorite combination.
  • At planting time, you can mix in some nitrogen fertilizer, too, and side dress every few weeks until the bulbing process begins

When planting onions from sets, dig a trench about 1 to 2 inches deep, space the bulb 2 to 6 inches apart. Rows should be spaced 12 to 18 inches apart. Its important to suppress weeds, so mulching is recommended.

Onions like consistent moisture, to support the growth and swelling of the bulb. Make sure that they receive approximately an 1″ of water each week. Remember onions are bulbs and if they sit in too much water they may rot. if you live in a rainier location, ensure that the soil is well draining.

Harvesting & Storing:
Onions can take over 90 days when starting with sets. You will know that the onion is fully mature when half of the top leaves have collapsed and started to dry.Once you see that half the leaves have collapsed, very gently coax the remaining leaves down, without breaking them off the bulb. 

You can begin to use onions for immediate cooking, but if you would like to store some onions it is recommended that you allow to stay in the ground a tad longer.

Then allow the bulbs to sit in the ground and cure for a couple of days before you lift them.When it is time to lift the onions, try to do it during drier weather, so mud isn’t sticking to the bulb. You’ll have better luck digging up the onion bulbs, rather than pulling them. You don’t have to dig deep—just enough to loosen the remaining roots. Shake and brush off any loose soil and let the bulbs finish curing in a warm, dry place with good air circulation. Leave the leaves on. 

Once the onion skin dries and the neck has started to shrivel you can store them. Place onions in a cool and dry location. To preserve them longer store them in about 40 degrees  ( don’t allow to freeze). Also hanging them in mesh bags or braiding the tops for hanging will allow them to have great air circulation!


Hello November

While the season may feel like its winding down there are plenty of fun outdoor & indoor gardening activities. Here are some of our top recommended gardening tips for the month of November.

1. Transplant Cool-Season Flowering Plants

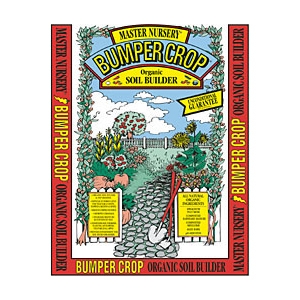
Remember those Mums and Asters you bought earlier in the fall? If you didn’t already plant them in the ground. consider finding them a spot in a garden bed. This way the protection and warmth from the ground will give them a great chance of over-wintering. Want to give them the extra Loving care they deserve? When you dig the planting hole make it twice as wide as the rootball and mix in BumperCrop Compost around the plants new root zone. Bumper Crop will give the plant all the nutrients it needs to grow big and strong. Add a “Blanket” over your newly planted mums, they prefer 3″ of pine fine mulch right over top of their roots.

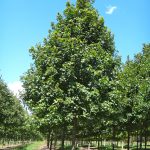
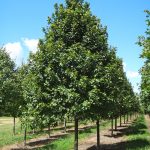
2. Late-Season Plantings

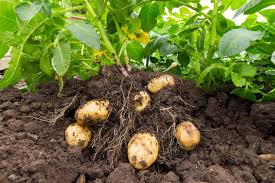
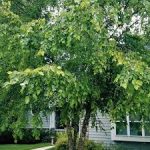
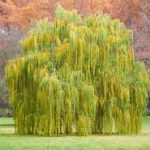
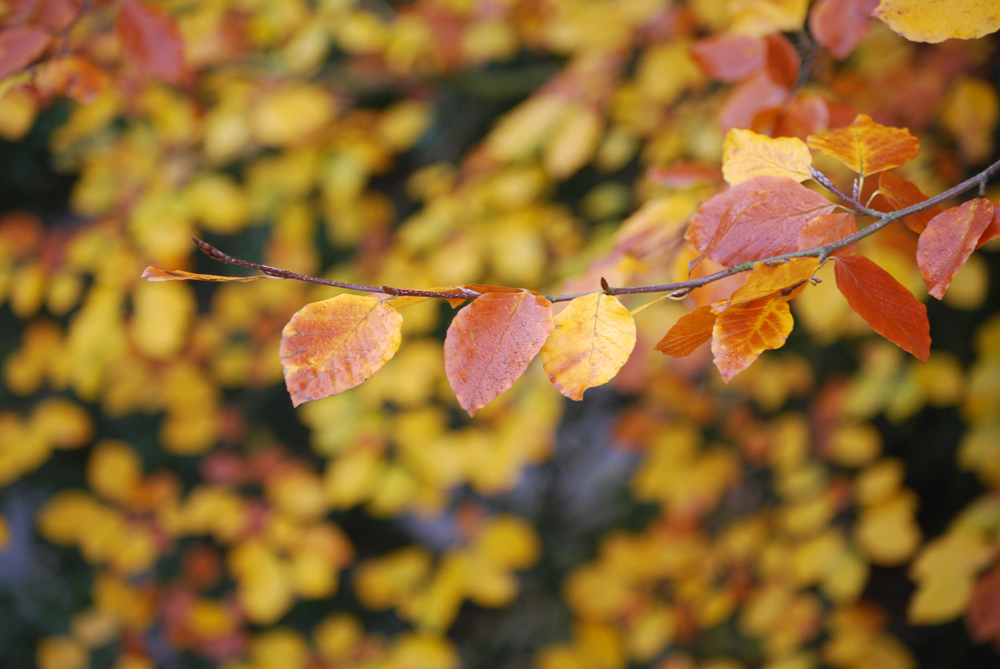
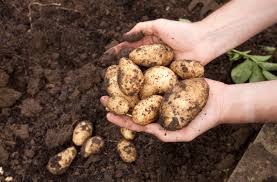
Don’t forget to take advantage of the best planting season of all; FALL! Plants love being planted in fall, since the soil still has warmth which allows their new roots to grow! Remember as long as you can dig in the soil, you can plant perennials, trees and shrubs. Garlic is a great crop to plant in November for a large June harvest!

3.Complete the last Fall Harvest

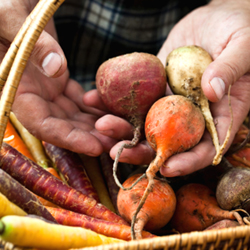
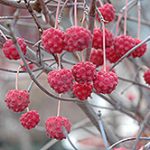
November signals the end of Fall vegetable crops. Watch the weather and harvest those last

few veggies! Typically Kale, Char, Brussel Sprouts, Cabbage, Carrots, & Parsnips will handle a frost or two, but get these harvests in before the deep cold comes! (it can sneak up on us)

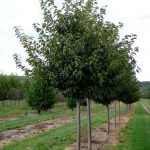
Don’t forget to harvest those last apples that are hanging off the tree! Don’t have an apple tree yet? Plant one this fall -it’s not too late- it’s actually the preferred time by horticulturists.

4. Fall Clean Up

After several frost have occurred, cut back any perennials that may have had diseases this season. This will help prevent bacteria and fungus from over wintering in your garden. Be sure not to compost those leaves (burn or trash them). Prune limbs that are damaged or crossing but don’t be overzealous by shearing the whole plant. It can cause winter damage.  Clean up old annuals that won’t return in spring. If you don’t want volunteer plants make sure to clean up old fruits and flowers or they may seeds my take off next spring.

5. Plant Amaryllis & Paperwhite Bulbs

These gorgeous flowers add cheerful color during the holidays, adding to your stylish home decor. They also make great gifts, especially if you need a last minute hostess gift! Place a few around your home, you will feel like you took home the florist’s shop, on a budget!


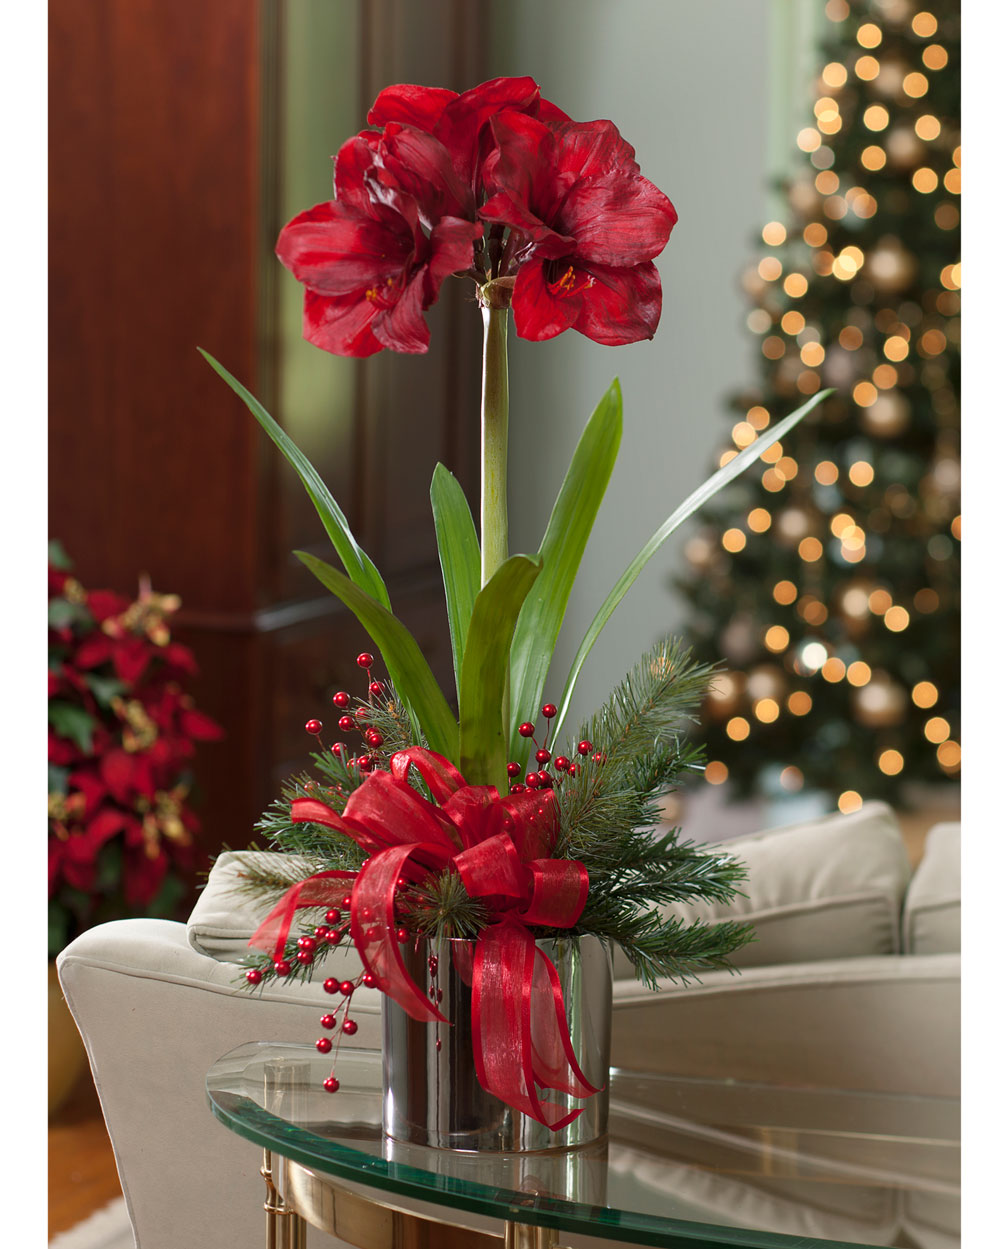
6. Weed & Mulch Flower Beds

By getting those weeds out, you’ll get a jump start on spring cleaning and their roots will be smaller and easier to pull. Top the beds with 2- 3 inches of pine mulch, to keep your plants warm all winter long. Pine mulch is the best for plant and soil health because as it breaks down it releases nutrients.

7. Winterize Birdbaths, Fountains and Irrigation systems

These gorgeous flowers add cheerful color during the holidays, adding to your stylish home decor. They also make great gifts, especially if you need a last minute hostess gift! Place a few around your home, you will feel like you took home the florist’s shop, on a budget!


Fall Tree Collection

Did you know Fall is the best time to plant Trees?

When you plant in fall, you take advantage of warm soil temps and milder air. Also more rain and moderate temperatures equals less watering. And when spring comes around, your plants will already be in the ground, with established root systems and ready to grow when the sun hits them.

‘October Glory’ Maple

This fast growing maple provides vibrant long-lasting fall color of scarlet-red. This tree makes an excellent lawn or street tree. Plant in Sun to Part Sun reaches 40′ high and 35′ wide.

‘Dura Heat’ River Birch

‘Dura Heat’ is a more heat and drought tolerant form of this species, with superior insect and disease resistance. The pyramidal form features dense, glossy leave that fade to clear butter yellow in fall and striking winter bark that is a pinkish orange with prominent exfoliation. Great as a focal point tree or shade tree. Fast growing to 40′ tall and 25-35′ wide.

 Kousa Dogwood

 Kousa Dogwood features showy clusters of white flowers with white bracts held atop the branches in late spring. It features an abundance of magnificent pink berries from early to mid fall. It has bluish-green foliage throughout the season. The pointy leaves turn an outstanding brick red in the fall. Slow to medium growing tree reaches 15′ tall and 12′ wide.

Weeping Willow

Graceful and refined, easily recognized by its open crown of ground-sweeping branches. Leaves are light green above, grayish-green beneath. This willow grows especially well near water, reaches 30′ – 40′ tall, 35′ spread.

Cherry Trees

‘Kwanzan Cherry’ is one of the most popular cherries and is known for its beautiful pink double flowers that bloom in spring. It has lovely fall color and makes a wonderful specimen that can be planted in large containers, near walkways and in the yard.

Double Weeping Cherry:  Graceful, long weeping boughs sway like willows in the breeze, densely packed with large magenta buds that open to perfect double pink flowers in spring. Blooms later than some, making it less prone to bud damage from a late season cold snap. Plant as a focal point or use pairs to frame entries.

‘Okame’ Cherry is one of the most delicate and finest flowering trees available. One of spring’s earliest flowering trees, you’ll be the envy of everyone on your block when the cloud of gorgeous pink blossoms erupts in your yard. Very showy because the fluffy carmine-pink flowers are made up of petals up to one inch wide… which bloom in clusters of two to five. Thrives in a wide variety of climates and provides a beautiful fall foliage display when the leaves turn yellow, orange and red.


This is just a few of our wonderful trees. Also not pictured:

Black Gums

Redbuds

Tulip Poplars

Elms

Snowbells

Why Bumper Crop Compost is Amazing

Why Bumper Crop Compost is Amazing:

Not only does it break up compacted clay soil, it retains moisture so you won’t have to water as much. It provides natural nutrients to help feed your plant’s root system. The added calcium from lobster shells is important for good leaf development. It also contains the beneficial fungus called mycorrhizae. This fungus creates a symbiotic relationship with the plants roots, that will increase the surface area, allowing the roots to uptake more water and nutrients.

CONDITIONING YOUR SOIL

Bumper Crop® Soil Builder can greatly improve the quality of your garden soil. It will loosen clay and other hard, compacted earths, improving drainage, planting texture, and aeration. It will help bind sandy or rocky soils to promote water retention. In all kinds of garden soils, Bumper Crop® Soil Builder will make cultivation easier, provide better moisture absorption and retention, increase all-around soil aeration and provide a beneficial environment for micro-organisms.

INGREDIENTS

Endomycorrhizal fungi colonize approximately 80% of the world’s plant species, including most vegetables, fruit trees and shrubs, flowering plants, grasses, legumes and many more. Ectomycorrhizal fungi colonize approximately an additional 7% of the world’s plant species including most conifers and a few broadleaf trees such as oak, elm, poplar, birch and beech. For more information about mycorrhizae visit: https://www.usemyke.com. Store this bag in a cool, dry, shaded place, avoiding direct sunlight.

Contains 135.11 viable mycorrhizal propagules per cubic centimeter (cc) of the following organisms:

Ecto Mycorrhizae species:
Pisolithus tinctorius @105.04 spores/cc
Rhizopogon roseolus @005.00 spores/cc
Rhizopogon subscaerelescens @005.00 spores/cc
Rhizopogon villosulus @005.00 spores/cc
Rhizopogon vulgaris @005.00 spores/cc
Scleroderma cepa @005.00 spores/cc
Scleroderma citrinni @005.00 spores/cc
Endo Mycorrhizae species:
Glomus intraradices @ 00.07 spores/cc

Worm Castings are full of biologically activated minerals, the best manure for the soil comes from the soil! Lobster and Crab Shells are rich in chitin and help make plants strong and disease resistant. Kelp Meal stimulates soil bacteria helping to increase soil fertility. Dehydrated Poultry Manure is great for growing green and vigorous plants. Sphagnum Peat Moss provides a stable environment for root growth and helps hold water and maintain pore space. Composted Cow Manure brings active biology and is rich in organic matter plant roots need. Aged Bark provides organic matter in the form of spongy pieces of decayed wood and bark adding structure and holding moisture. Dolomitic Lime added to adjust pH.

What to use it for?

Almost everything! Bumper Crop is especially beneficial when growing vegetables, but will also help you grow beautiful perennials and shrubs. When planting, mix up to 50% BumperCrop to the existing soil. If your soil has poor drainage, add in 25% pine fines mulch and you have yourself a recipe for success!

Top 5 Reasons fall is for planting

Top 5 Reasons fall is for planting

Most of the time you think of spring when planning to plant. Yet fall is truly the best time to plant. With the warm soil temperatures (from summer) , cooler air and more rainfalls, conditions are prime for planting success!

  1. Get a Jump Start on Spring Growth

Planting perennials and shrubs in the fall gives them a head start on growth the following spring. Root systems will start to grow once the ground thaws, long before the soil can be worked by human hands and any new plants can be put in. This early start means first-season plants can actually show their flowers!

  1. The Cool weather

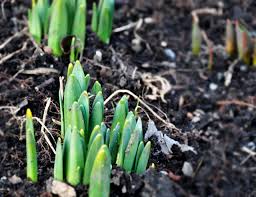
If the hot, sweaty weather isn’t for you, try gardening in the fall. The crisp, cool air makes for an enjoyable, leisurely experience working in the garden. P.S. the plants love it too, the warm soil from summer encourages lots of root growth.


  1. Crucial Support for pollinators

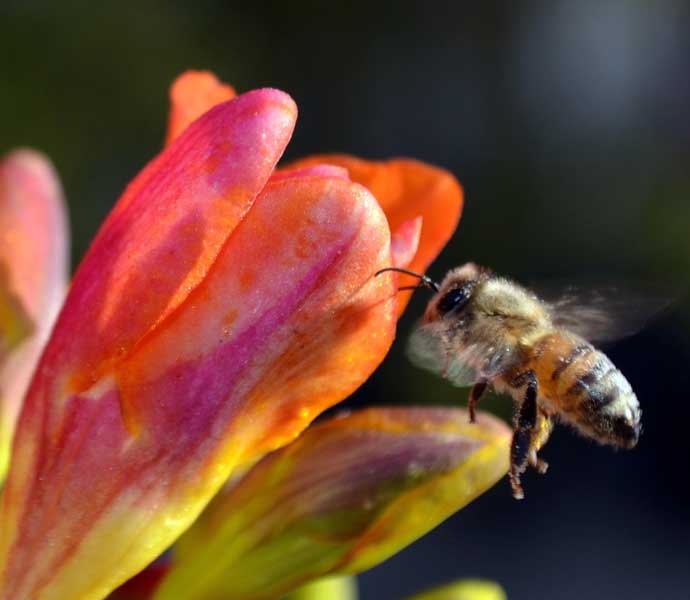
With earlier blooms comes earlier nectar sources for pollinators, who struggle to find food at the end and beginning of gardening season. Anytime you can provide early-spring (and autumn) food supply for birds, bees, and butterflies, you’ll be doing your part to protect the human food supply! We rely on pollinators to help us put food on our own dinner tables!

  1. Less water

The cooler weather helps to eliminate evaporation and shorter days mean that photosynthesis actually slows down, resulting in your new plants requiring less water than if planted in spring.

  1. Camouflage early spring blooming bulb foliage

By partnering fall planting, spring blooming bulbs with perennials, the dying bulb foliage will be engulfed by the perennial and allow them to naturally die back to provide strength for next year’s bloom. When most fall bulbs are blooming, perennials are in their dormant stage. As the bulb nears the end of its bloom time, the perennial will start to grow, and subsequently cover the bulb tops when the bloom is gone. It also saves time by digging a hole once and getting 2 seasons of color.

“Hellebores make the Winter worthwhile”

The fascinating elegance of Hellebore is head and shoulders above any other winter flower. Just as the season is getting tedious, with holidays over, hellebore emerge. Standing tall in a season of garden dormancy, they quietly remind us of wonderful things ahead.

Hellebore Tips

Lenten Rose – Helleborus orientalis. A Spring flowering hellebore with cerise pink flowers.

The colors of Helleborus orientalis are the most scintillating, so start with good original plants before allowing them to hybridize. As long as you like the colors, it doesn’t matter about their names.

Because the flower heads tend to look downwards, grow hellebores on a slope, preferably outside a window. Newer hybrids have been developed so that their flowers are held upright.

Hellebores mix well with other early spring flowers, under deciduous trees or shrubs. Freshly mulched soil sets them off to best effect.

Imitate a woodland floor by providing sheltered, moist, and well-drained conditions which are mulched with leaf-mold or bark chips.

Trimming old foliage which has grown large and coarse over the summer not only removes potential disease, but reveals the flowers to bees and other early pollinators.

Hellebores love to reproduce. Deadhead flowers as seed pods ripen or raise new seedlings from a particularly good plant. Remove any new color combinations that are not special.

When transplanting hellebores directly from their nursery containers, be sure to shake off the potting mix and free up any bound roots.

Be careful not to plant your hellebores too deeply as this can hinder flower production. Make sure the crown of the plant is just slightly buried beneath the soil.

Plant with companions such as snowdrops, crocus, muscari, daffodils, phlox and bleeding heart.

Growing Potatoes

Have you ever tasted home grown potatoes? Most say there is no comparison to store bought potatoes. Home grown potatoes are fresher, more flavorful and healthier for you. A small number of seed potatoes will yield buckets of potatoes ready to eat and enjoy and can even be stored throughout the winter months

Soil Requirements

  1. Potatoes must have well-drained, moisture retentive, fertile soil that is high in organic matter and a pH between 5.0-6.0. Do not use a lime soil, the soil should be slightly acidic.
  2. To prevent disease problems, do not plant potatoes in the same area as tomatoes.
  3. Potatoes should be rotated on a 3 year program.

WHEN TO PLANT POTATOES

Potatoes prefer cool weather. Typically for our Zone 6, St. Patrick Day is a great time to start planting potatoes. You should always remember….

  • The soil, not the calendar, will tell you when it’s time to plant. The soil should not be so wet that it sticks together and is hard to work. Let it dry out a bit first. Like other seeds, potato seed pieces will rot if planted in ground that’s too wet.
  • Soil temperatures should be reaching the 50 degrees mark, before the potato would start to grow.

Seed Potato Preparation

  1. Before planting place your seed potatoes in a warm location (between 60-70 degrees) in full 
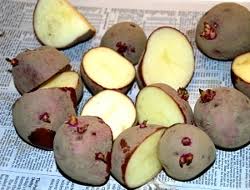
sun, such as a kitchen window sill for one to two weeks. This will induce sprouting to make it easier in the following steps.
  2. one day before planting take a sharp, clean knife and cut the potato into planting pieces or “seeds”. Each piece should be approximately 1.5″-2″ and must contain at least 1 or 2 eyes. (Eyes can be identified as the indentations or dimples on a potato. These indentations lead to sprouting buds, that will eventually make there way to the soil surface and be the stalk to the potato leaves.) Small potatoes with a minimal amount of eyes may be planted whole.
  3. Allow “seeds” to dry (1-2 days) and form a callous over their cuts.

Planting Tips

  1. Dig a tench 12″ deep and add compost at the bottom of the trench where it will be most beneficial to the newly forming roots.
  2. Place potato seeds 18″ apart (if intensive planting 9″ diamond pattern)  and 4″ deep inside the trench, with the cut side down and eyes pointing upwards. Don’t fill the trench completely.
  3. Depending on the soil temperature, stems will emerge from the potato seeds with in two weeks. At this time add another 3-4″ of soil into the trench.
  4. After another 2-3 weeks add 3-4″ more of soil on top and around the potatoes.
  5. Monitor the potatoes, add soil or mulch (pine mulch or straw) as needed to ensure new potatoes forming are not exposed to sunlight. If young potatoes are exposed while developing , they will turn green. This green portion may be toxic if eaten.
  6. Water you potatoes well and frequently, keep them weed free (as weeds steal nutrients from them).

Helpful Tips

To mazimize your crop, keep potatoes well watered throughout the Summer, but especially during the period when they are in flower and immediately thereafter.  Water early in the day, this allows foliage to dry completely before the evening.

Potatoes grow great in containers and Potatoes  Bags!

The best starters are seed potatoes. Do not confuse seed potatoes with potato seeds or grocery produce! Select seed potatoes which have protruding eyes (buds).

Harvest Time

In general potatoes should not be harvested until two weeks after the foliage has died back. This allows the skin to set and reduces skin peeling, bruising and rotting while in storage. After harvesting immediately store in a cool, dry and dark place.

Gently dig around the plant and pull up the largest potatoes (for cooking use) and allow smaller ones to remain in the ground and keep growing.

If by the end of September the foliage has not died back, all of the foliage should be cut to the ground to ensure the crop has ample time to mature before winter. 

7 Stylish Plants to Keep Winter Blues Away

Give life (literally) to a bare wall, empty table or dull corner in your home. Easy to care for houseplants are the most stylish home accessory splashed across pages of design publications, blogs and Pinterest! Forget the dusty, artificial Ficus tree or droopy hanging plant at grandma’s house. Houseplants are on trend and an easy way to add high style to your home.

Chinese Money Plant, with its striking large circular smooth green leaves, is one of the trendiest plants at the moment. Its full name is Pilea peperomioides and they enjoy bright light and moderate to low water. They are perfect friendship plants as it’s easy to pop a leaf off to give to a friend to propagate.

Fiddle leaf figs have taken the spot in many design magazines and for great reasons. Their bold green leaf can pair with any numerous pots and lend itself to a modern sleek look or a cozy cottage feel. These plants are fairly easy, just place them in indirect light and let them get dry between watering.

Calathea: A bold and beautiful houseplant, calathea looks good even without flowers. There are lots of varieties of calathea, but one of the most common has luscious, dark green leaves that have scalloped edges and silver brushmarks on the top of the leaves. Underneath, the leaves are a lovely shade of burgundy purple. Each one is a living work of art! Grow calathea in medium to low light. This beautiful tropical doesn’t like much sun on its leaves, so shield it from direct light to prevent sunburn. Water calathea enough to keep it moist, but not wet or saturated.

 Snake Plant: If you’re looking for an easy-care houseplant, you can’t do much better than snake plant. This hardy indoor is still popular today — generations of gardeners have called it a favorite — because of how adaptable it is to a wide range of growing conditions. Most snake plant varieties have stiff, upright, sword-like leaves that may be banded or edged in gray, silver, or gold. Snake plant’s architectural nature makes it a natural choice for modern and contemporary interior designs. It’s one of the best houseplants around! Place in low light to full sun and let dry between watering.

Dracaena has bold and architecturally pleasing foliage. The arching flow of these dramatically striped leaves lends a sense of movement to a tabletop or desk. Plants are content in low light, and need only moderate watering and occasional feeding to thrive. A handsome, low-maintenance accent plant for almost any room.

Wandering Jews, also called spiderworts, are valued for the stripes of white, green, silver, and purple colors of their foliage. They have trailing vines that flow from their base and are very easy to care for. Place them in bright indirect light for best foliage color and let them become slightly dry before watering.

Crispy wave fern: due to its uniquely strong fronds, hardiness, and adaptability, crispy wave can outlive almost any other potted plant. If you tend to this low maintenance plant properly, it will keep your air naturally clean for a very long time. Place it in medium to low light and never let it dry out!

Cyclamen Care Guide

  Cyclamen are one of the most beautiful and best winter bloomers. Over the years, growers have come up with many new hybrids for us to enjoy. Some have ruffled flowers, and some varieties are miniature, but all maintain a large bright flower, usually in red, pinks, maroons and white. All Cyclamen display green or variegated heart shaped leaves.

Cyclamen are a great indoor plant – easy 8 weeks plus of color.
One of the reasons our Cyclamen last as long as they do is that we build up the base of the plant first.  Proper variety selection, culture and nutrition will allow the plant to grow a lot of leaves – and with Cyclamen, leaves = flowers.  If you gently push apart the leaves on one of our Cyclamen you will see lots of buds coming up from the center. You can also move a Cyclamen outside in April – the plant will take a freeze, but you should be careful to acclimate the plant so the change isn’t too great, both from a temperature and sunlight perspective.

Cyclamen are actually a type of bulb or more specifically a Corm (a short, thickened vertical stem). Their native habitat is the Mediterranean and Southern Europe. In your home, Cyclamen like to be a little on the cooler side with temperatures around 61˚F and in direct light or bright indirect light.

While in bloom, keep the root ball moist and feed the plant every two weeks. Cyclamen should be kept moist by watering in a tray and allowing the roots to take up the water rather than watering from above the plant which can lead to rotting. Remove yellow leaves and spent flowers.

When cyclamen are done blooming they can be discarded or the corm can be saved. After the foliage dies back, the plant should be left to dry. The corm should then be dug and repotted in midsummer and placed in a warm place so it can establish roots before returning it to a cool 55 – 60˚ F. to encourage flowering.

Light

Give cyclamen bright, indirect light in the winter when they are actively growing. In summer, it is best to keep cyclamen in a cool, dark spot with good air circulation. You can also move it to a shady spot outdoors in summer. Just make certain it is not getting too much water.

Soil

Cyclamen persicum does best when planted in a soilless-based potting mix, with the top of the tuber just slightly above the soil line.

Water

When leaves are present, the plant is actively growing. Water whenever the soil feels dry about an inch below the surface. Avoid getting water on the crown of the plant, which could cause it to rot.

As the flowers begin to fade, gradually allow the plant to dry out for two to three months. It is going into a dormant stage, and any excess water will cause the tuber to rot. If you put it outdoors during dormancy, be sure to turn the pot on its side to keep the rain out. A little water is not harmful, but you don’t want the soil to remain wet.

Temperature and Humidity

Cyclamen do not like extreme heat, drafts, or dry air. They do best in a climate that replicates their native environment, between 50 degrees Fahrenheit and the mid-60s. High humidity, especially during winter, is crucial. Keep the cyclamen on a tray of water with a layer of pebbles or gravel to form a shelf for the cyclamen pot to sit on. Do not let the bottom of the cyclamen pot sit submerged in the water or the roots will rot.

If you moved your plant outdoors for the summer, bring it back indoors before the weather turns cold. A good rule of thumb is to bring it inside while the temperature is still comfortable for you with the windows open.

Fertilizer

Feed your cyclamen plant with a diluted liquid low-nitrogen fertilizer and high in phosphorus every couple of weeks while in full leaf. You do not need to fertilize cyclamen while it is dormant.

Potting and Repotting

Cyclamen should be repotted every two years. You can re-pot while the plant is dormant, in the summer, with fresh soil and a slightly larger pot.

  1. Fill the new container part way with potting soil.
  2. Lift the tuber out of the original pot and brush off the old soil, but don’t rinse it. Place the tuber in the new pot so that its top is about one inch from the rim. Cover it halfway with potting soil.
  3. Place the pot in a shady, dry spot for the rest of the summer. Start watering it around September and you should start to see new growth emerging.