Monthly Archives: March 2020

“Hellebores make the Winter worthwhile”

The fascinating elegance of Hellebore is head and shoulders above any other winter flower. Just as the season is getting tedious, with holidays over, hellebore emerge. Standing tall in a season of garden dormancy, they quietly remind us of wonderful things ahead.

Hellebore Tips

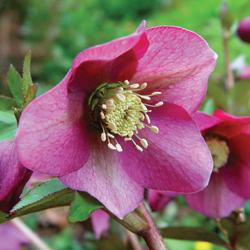
Lenten Rose – Helleborus orientalis. A Spring flowering hellebore with cerise pink flowers.

The colors of Helleborus orientalis are the most scintillating, so start with good original plants before allowing them to hybridize. As long as you like the colors, it doesn’t matter about their names.

Because the flower heads tend to look downwards, grow hellebores on a slope, preferably outside a window. Newer hybrids have been developed so that their flowers are held upright.

Hellebores mix well with other early spring flowers, under deciduous trees or shrubs. Freshly mulched soil sets them off to best effect.

Imitate a woodland floor by providing sheltered, moist, and well-drained conditions which are mulched with leaf-mold or bark chips.

Trimming old foliage which has grown large and coarse over the summer not only removes potential disease, but reveals the flowers to bees and other early pollinators.

Hellebores love to reproduce. Deadhead flowers as seed pods ripen or raise new seedlings from a particularly good plant. Remove any new color combinations that are not special.

When transplanting hellebores directly from their nursery containers, be sure to shake off the potting mix and free up any bound roots.

Be careful not to plant your hellebores too deeply as this can hinder flower production. Make sure the crown of the plant is just slightly buried beneath the soil.

Plant with companions such as snowdrops, crocus, muscari, daffodils, phlox and bleeding heart.

Growing Potatoes

Have you ever tasted home grown potatoes? Most say there is no comparison to store bought potatoes. Home grown potatoes are fresher, more flavorful and healthier for you. A small number of seed potatoes will yield buckets of potatoes ready to eat and enjoy and can even be stored throughout the winter months

Soil Requirements

  1. Potatoes must have well-drained, moisture retentive, fertile soil that is high in organic matter and a pH between 5.0-6.0. Do not use a lime soil, the soil should be slightly acidic.
  2. To prevent disease problems, do not plant potatoes in the same area as tomatoes.
  3. Potatoes should be rotated on a 3 year program.

WHEN TO PLANT POTATOES

Potatoes prefer cool weather. Typically for our Zone 6, St. Patrick Day is a great time to start planting potatoes. You should always remember….

  • The soil, not the calendar, will tell you when it’s time to plant. The soil should not be so wet that it sticks together and is hard to work. Let it dry out a bit first. Like other seeds, potato seed pieces will rot if planted in ground that’s too wet.
  • Soil temperatures should be reaching the 50 degrees mark, before the potato would start to grow.

Seed Potato Preparation

  1. Before planting place your seed potatoes in a warm location (between 60-70 degrees) in full sun, such as a kitchen window sill for one to two weeks. This will induce sprouting to make it easier in the following steps.
  2. one day before planting take a sharp, clean knife and cut the potato into planting pieces or “seeds”. Each piece should be approximately 1.5″-2″ and must contain at least 1 or 2 eyes. (Eyes can be identified as the indentations or dimples on a potato. These indentations lead to sprouting buds, that will eventually make there way to the soil surface and be the stalk to the potato leaves.) Small potatoes with a minimal amount of eyes may be planted whole.
  3. Allow “seeds” to dry (1-2 days) and form a callous over their cuts.

Planting Tips

  1. Dig a tench 12″ deep and add compost at the bottom of the trench where it will be most beneficial to the newly forming roots.
  2. Place potato seeds 18″ apart (if intensive planting 9″ diamond pattern)  and 4″ deep inside the trench, with the cut side down and eyes pointing upwards. Don’t fill the trench completely.
  3. Depending on the soil temperature, stems will emerge from the potato seeds with in two weeks. At this time add another 3-4″ of soil into the trench.
  4. After another 2-3 weeks add 3-4″ more of soil on top and around the potatoes.
  5. Monitor the potatoes, add soil or mulch (pine mulch or straw) as needed to ensure new potatoes forming are not exposed to sunlight. If young potatoes are exposed while developing , they will turn green. This green portion may be toxic if eaten.
  6. Water you potatoes well and frequently, keep them weed free (as weeds steal nutrients from them).

Helpful Tips

To mazimize your crop, keep potatoes well watered throughout the Summer, but especially during the period when they are in flower and immediately thereafter.  Water early in the day, this allows foliage to dry completely before the evening.

Potatoes grow great in containers and Potatoes  Bags!

The best starters are seed potatoes. Do not confuse seed potatoes with potato seeds or grocery produce! Select seed potatoes which have protruding eyes (buds).

Harvest Time

In general potatoes should not be harvested until two weeks after the foliage has died back. This allows the skin to set and reduces skin peeling, bruising and rotting while in storage. After harvesting immediately store in a cool, dry and dark place.

Gently dig around the plant and pull up the largest potatoes (for cooking use) and allow smaller ones to remain in the ground and keep growing.

If by the end of September the foliage has not died back, all of the foliage should be cut to the ground to ensure the crop has ample time to mature before winter.