The Complete Watering Guide
For Newly Planted Perennials, Shrubs, Trees, Annuals, Containers & Hanging Baskets
Watering is one of the most important parts of helping plants succeed, especially during their first growing season. Most plant issues after planting come back to one of a few things: not enough water reaching the root ball, too much water sitting around the roots, shallow watering, poor drainage, or root competition from nearby established plants.
The goal is not to water a little bit every day. The goal is to water deeply, slowly, and correctly so moisture reaches the roots where the plant needs it most.
This guide will help you understand how to water newly planted perennials, shrubs, trees, annuals, containers, and hanging baskets — plus what to prioritize during extreme heat.
The Golden Rule of Watering
Water deeply, then check before watering again.
The soil should be moist below the surface, but not soggy. Roots need both water and oxygen. If soil stays constantly saturated, roots can struggle, especially in heavy clay soil. If the root ball dries out too much, the plant cannot take up enough moisture to support its leaves, flowers, and new growth.
The best watering habit is simple:
Check the soil. Water deeply. Let the soil guide you.
Why Deep Watering Matters
Plants grow roots where the conditions are best. If water only wets the top inch of soil, roots are encouraged to stay near the surface. Surface roots dry out quickly in heat, wind, and drought.
Deep watering helps moisture move down into the root zone. This encourages roots to grow down and outward into the surrounding soil. Over time, this helps plants become stronger, more drought-tolerant, and better established.
A plant that is only sprinkled on the surface may survive for a little while, but it will not develop the strong root system it needs for long-term success.
Deep watering is especially important for:
- Newly planted shrubs
- Newly planted trees
- Perennials planted in summer
- Plants near large established trees
- Plants in windy or sunny locations
- Evergreens going into winter
- Containers and hanging baskets during hot weather
Water Stress Can Mean Several Things
When a plant looks wilted, brown, or stressed, it does not always mean it was not watered at all. Water stress can happen for several reasons.
A plant may struggle because:
- It is not receiving enough water.
- Water is not reaching the original root ball.
- Water is being applied too quickly and running off.
- The surrounding soil is wet, but the root ball is dry.
- The plant is being watered too often but too shallowly.
- Heavy clay soil is staying too wet and reducing oxygen around the roots.
- Nearby large trees are taking up moisture first.
- The plant was planted too deeply.
- Mulch or soil was piled over the root ball.
This is why checking the soil is so important.
How to Check If a Plant Needs Water
Do not rely only on how the top of the mulch looks. Mulch can look damp while the soil underneath is dry, or it can look dry while the soil below is still moist.
Use the finger test, screwdriver test, or trowel test:
- Pull the mulch back from the base of the plant.
- Push your finger, a screwdriver, or a small trowel down 3–6 inches near the root ball.
- Feel the soil.
If the soil feels cool and slightly moist, wait to water.
If the soil feels warm, dry, dusty, or crumbly, water deeply.
If the soil feels wet, sticky, muddy, or sour-smelling, hold off and allow the soil to dry some before watering again.
For newly planted shrubs and trees, make sure you are checking near the original root ball, not just the surrounding soil.
The First Watering After Planting
The first watering after planting is one of the most important.
After the plant is in the ground, water slowly and thoroughly so both the original root ball and the surrounding backfilled soil are fully moistened.
This helps settle soil around the roots, removes large air pockets, and helps the plant begin transitioning from the nursery container soil into your garden soil.
Do not assume rainfall will do this first deep soak for you. Even a good rain may not fully saturate a newly planted root ball.
Summer Planting Tip: “Puddle It In”
One of our favorite professional planting tricks, especially during summer planting, is a method often called “puddling in.”
Before planting, dig the hole and fill it with water. Let that water drain into the surrounding soil. In very dry conditions, you can do this a second time.
Then place the plant, backfill the hole, create a small watering well around the plant, and water deeply again.
This gives the new plant moisture where it needs it most — down in the planting hole and around the root zone — instead of only wetting the surface.
A few days later, fill the watering well again. Repeating this several times helps the plant settle in and encourages the roots to move into the surrounding soil.
Important note: in heavy clay soil, the water should drain before planting. If the hole stays full of water for hours, drainage may be poor and the plant may need to be planted higher or the site may need to be reconsidered.
How to Deep Water Properly
Deep watering means watering slowly and thoroughly enough that moisture reaches the full root ball and surrounding soil.
Good watering methods include:
- A hose on a slow trickle
- A watering wand used slowly at the base
- A soaker hose
- Drip irrigation
- Tree watering bags for young trees
- A 5-gallon bucket with small holes drilled near the bottom for slow release
Avoid quick spraying over the top of the plant. It often wets the leaves, flowers, and mulch but does not soak the root ball deeply enough.
The goal is to water slowly enough that the water soaks in instead of running across the surface.
Professional Trick: Measure Your Hose Flow
Every hose and watering wand is different. To know how much water your plant is actually getting, measure your hose flow rate.
Here’s how:
- Place your hose or watering wand in a 5-gallon bucket.
- Turn the water on at the same pressure you normally use.
- Time how long it takes to fill the bucket.
For example, if it takes 2 minutes to fill a 5-gallon bucket, then your hose is delivering about 2.5 gallons per minute.
If your plant needs about 10 gallons of water, you would water for about 4 minutes at that same flow rate.
This takes the guesswork out of watering and helps make sure your plants are getting a real deep soak.
If Water Runs Off Instead of Soaking In
If your soil is very dry, compacted, sloped, or heavy clay, water may run across the surface instead of soaking down into the root zone.
In this case, water in rounds:
Water slowly for a few minutes, pause and let it soak in, then water again.
This gives the soil time to absorb moisture instead of letting water run away from the plant.
For plants on slopes, it can also help to create a small soil ring or basin on the downhill side of the plant to hold water long enough for it to soak in.
If the Root Ball Has Dried Out
Sometimes the original nursery root ball becomes very dry and difficult to rewet. This is especially common with container-grown plants in peat-based potting mixes.
When this happens, water may run around the root ball instead of soaking into it. The surrounding soil may feel damp, but the plant’s roots are still dry.
If you suspect the root ball is dry:
- Water slowly.
- Pause for several minutes.
- Water again.
- Check the root ball with your finger or trowel.
- Repeat until the root ball feels moist, not dry and hard.
For containers and hanging baskets, soaking the pot briefly can help rehydrate the root ball. For in-ground plants, slow repeated watering is usually best.
Newly Planted Perennials
New perennials have smaller root systems and dry out faster than established plants. They need regular attention while they settle in.
First 1–2 Weeks
Check daily, especially in warm, windy, or dry weather. Water when the root ball or surrounding soil begins to dry.
Weeks 3–8
Water deeply 2–3 times per week as needed, depending on weather, soil, sun exposure, mulch, and rainfall.
After 8–12 Weeks
Begin watering less often but more deeply to encourage roots to expand into the surrounding soil.
Newly planted perennials often need more attention than people expect. A quick sprinkle is usually not enough during hot weather.
Water at the base of the plant, not over the flowers and foliage. Keep mulch around the plant to conserve moisture, but do not bury the crown of the plant.
Newly Planted Shrubs
New shrubs need consistent moisture while they establish. Even drought-tolerant shrubs need regular water during their first season.
A good starting point is to check soil moisture at least once or twice per week. In hot, dry, windy weather, or when planted near large established trees, check more often.
Water deeply when the soil is dry several inches down.
General Watering Guide for New Shrubs
A small 1-gallon shrub will need much less water than a large 7-gallon or 10-gallon shrub. Larger plants have larger root balls and need a slower, longer soak.
As a general guide:
- 1-gallon shrub: usually a few gallons per watering
- 3-gallon shrub: several gallons per watering
- 5-gallon shrub: often 5–10+ gallons per week during warm, dry weather
- Larger shrubs: may need 10–15+ gallons per week during hot, dry periods
These are starting points, not strict rules. Soil moisture is always the final judge.
Example
For a newly planted 5-gallon Forsythia, a good general goal may be around 10–15 gallons of water per week during warm, dry weather, applied slowly and deeply. Then check midweek by feeling the soil about 3 inches down near the root ball.
If it still feels cool and moist, wait. If it feels warm and dry, water deeply again.
Newly Planted Trees
New trees need careful watering because their roots are still mostly inside the original root ball. Rain often does not soak that root ball deeply enough, especially if the tree was container-grown or balled-and-burlapped.
First Few Weeks
Check moisture frequently and water when needed. The original root ball should not be allowed to dry out completely.
First 1–2 Years
Continue checking soil moisture weekly during the growing season, especially during hot, dry weather. Newly planted trees need support until their roots have grown into the surrounding soil.
Where to Water a New Tree
For a brand-new tree, focus water over the root ball and planting area. As the tree grows, expand the watering area outward.
Tree roots grow outward far beyond the trunk, so watering only at the trunk is not enough long term.
A tree watering bag can be helpful for newly planted trees because it releases water slowly over several hours.
Established Perennials, Shrubs & Trees
Established plants usually do not need frequent watering, but they may still need help during drought, extreme heat, or long dry spells.
Established Perennials
Water deeply when the soil is dry several inches down, especially if plants are wilting in the morning, browning at the edges, or failing to bloom.
Established Shrubs
Most established shrubs benefit from deep watering during extended dry periods. Water around the root zone, not just at the stem.
Established Trees
Large established trees usually need less routine watering, but during severe drought, valuable ornamental trees benefit from slow, deep watering over a wide area under and beyond the canopy.
Water near the drip line and beyond, where many feeder roots are located.
Special Note: Plants Near Large Established Trees
New plants growing near large trees need extra attention.
Large trees have extensive root systems that pull moisture from the surrounding soil. A newly planted shrub, perennial, or annual nearby is competing with a much larger, established plant.
This means new plants near trees may dry out faster, even if the area looks shaded or protected.
In these areas:
- Check moisture more often.
- Water slowly and deeply.
- Mulch well, but do not pile mulch against stems.
- Expect new plants to need extra care during the first year or two.
- Remember that large tree roots may take up water before the new plant can use it.
Plants near large trees may need more frequent deep watering than the same plant in an open bed.
Special Note: Evergreens
Evergreens continue to lose moisture through their leaves or needles even in cooler weather. This is especially important for arborvitae, rhododendrons, hollies, boxwoods, laurels, junipers, spruce, pine, and other broadleaf or needled evergreens.
Make sure evergreens are well-watered going into winter, especially if they were planted that same year.
Dry roots going into winter can lead to browning, winter burn, and stress the following spring.
Fall watering is especially important during dry autumn weather.
Rhododendrons, Azaleas & Other Sensitive Broadleaf Evergreens
Rhododendrons and azaleas are shallow-rooted plants that need consistent moisture, but they also need good drainage and oxygen around the roots.
They do not like:
- Dry root balls
- Heavy, compacted clay
- Sitting in soggy soil
- Being planted too deeply
- Mulch or soil piled over the root ball
- Frequent shallow watering
They prefer:
- Moist but well-drained soil
- Acidic, organic soil
- Pine fines or similar amendments in heavy clay
- Slightly high planting
- Light mulch over the root zone, not against the stem
- Slow, deep watering
With rhododendrons, too dry and too wet can look similar. Wilting, curling leaves, browning, and decline can happen from both drought stress and root stress. Always check the soil and root ball before deciding what to do.
Clay Soil vs. Sandy Soil
Soil type matters.
Heavy Clay Soil
Clay holds water longer but can also drain slowly. Water should be applied slowly so it has time to soak in.
Be careful not to water again before the soil has had a chance to breathe. Roots need oxygen, and heavy wet soil can deprive roots of air.
In Maryland clay, many plants benefit from being planted slightly high, with compost and appropriate amendments worked into the planting area.
Sandy or Loose Soil
Sandy soil drains quickly and may need more frequent watering. Water still needs to be deep, but it may need to happen more often.
Compacted Soil
Compacted soil can shed water instead of absorbing it. Slow watering, compost topdressing, and mulch can help improve conditions over time.
Mulch Makes Watering Work Better
Mulch helps hold moisture, keep soil temperatures steadier, reduce weeds, and protect roots.
For most landscape plants, use about 2–3 inches of mulch.
Keep mulch pulled slightly away from stems, trunks, and crowns. Do not make mulch volcanoes around trees or shrubs.
Too much mulch can keep trunks wet, reduce oxygen around roots, and even prevent water from reaching the soil properly.
For newly planted shrubs and trees, avoid piling heavy soil or thick mulch over the top of the root ball. The top of the root ball should remain at or slightly above the surrounding soil line.
Planting Depth Matters
Watering problems get worse when plants are planted too deeply.
The top of the root ball should usually be level with, or slightly above, the surrounding soil line. This is especially important in heavy clay soil.
If a plant is planted too deep, the roots may not receive enough oxygen. The plant may decline even if it is being watered.
After planting, do not cover the top of the root ball with heavy soil. Use only a light layer of mulch.
Drip Irrigation & Soaker Hose Tips
Drip irrigation and soaker hoses can be excellent, but they still need to be used correctly.
For newly planted shrubs and trees, make sure water is reaching the original root ball. Emitters placed too far away may water the surrounding soil but miss the root ball.
As the plant grows, move or add emitters farther outward to encourage the roots to expand.
Professional tip: After running drip irrigation, check the soil. Dig a few inches down and see where the water actually went. This is the best way to know whether the system is running long enough and watering the right area.
Annual Watering Guide
Annuals need different watering than shrubs and trees because they are working hard all season: growing, blooming, setting buds, and often living in hot, sunny spaces.
Many annuals have smaller root systems and need more frequent watering, especially in summer heat.
The goal is to keep annuals evenly moist but not soggy.
Annuals do not want to dry down completely over and over again, but they also do not want to sit in waterlogged soil.
Annuals Planted in the Ground
Annuals planted in the ground usually need less frequent watering than annuals in pots, but they still need regular moisture while they establish.
Right After Planting
Water thoroughly after planting so the root ball and surrounding soil are both moist. This helps settle the soil around the roots and reduces transplant stress.
For the first week or two, check daily, especially during warm or windy weather.
Once the plants begin rooting into the surrounding soil, you can usually water less often but more deeply.
General Watering for Annuals in the Ground
Most in-ground annual beds need consistent moisture. During hot, dry weather, annuals in full sun may need deep watering several times per week.
Water at the base of the plants, not over the flowers. A watering wand, soaker hose, or drip irrigation works well.
A quick sprinkle every day encourages shallow roots. A slower, deeper watering helps roots grow down and out, making the plants stronger and more heat-tolerant.
Annuals in Containers
Containers need more frequent attention than in-ground plantings. In summer, pots can dry out quickly — sometimes in a single afternoon.
How Often to Check Containers
In warm weather, check containers daily. In extreme heat, check morning and afternoon.
A container may need water if:
- The top inch of soil feels dry
- The pot feels very light when lifted
- Plants are wilted in the morning
- Soil is pulling away from the sides of the pot
- Water runs straight through without soaking in
How to Water Containers Properly
Water slowly until water runs out the drainage holes. This tells you the entire root zone has been moistened.
If water immediately runs out the bottom, the potting mix may be very dry and has pulled away from the sides of the pot.
In that case:
- Water once.
- Wait a few minutes.
- Water again.
The second watering is often what actually rehydrates the soil.
Important Container Rule
Never let containers sit in standing water for long periods. Drainage is critical. Roots need oxygen, and constantly soggy potting mix can cause root problems.
Hanging Basket Watering
Hanging baskets are usually the first plants to dry out. They are exposed to sun, wind, and heat from all sides, and many baskets are packed with fast-growing annuals.
In summer, many hanging baskets need water every day. In extreme heat, they may need water twice a day.
Calibrachoa, petunias, million bells, verbena, lantana, fuchsia, and mixed baskets can all dry quickly, especially in smaller baskets.
How to Water Hanging Baskets Properly
Take the basket down if possible and water slowly until water runs from the drainage holes.
If the basket is very dry:
- Water it once.
- Wait 5–10 minutes.
- Water again.
A very dry basket often sheds water at first. The second watering is what actually rehydrates the root ball.
Professional Hanging Basket Tip
If a basket is badly wilted and water runs right through it, set it in a tub, tray, or wheelbarrow with a few inches of water for 20–30 minutes.
This allows the root ball to rehydrate from the bottom.
Then let it drain fully before hanging it back up.
Do not leave baskets soaking all day or overnight. The goal is to rehydrate, not drown the roots.
Best Time of Day to Water
Morning is usually best.
Morning watering gives plants moisture before the heat of the day and allows foliage to dry.
During extreme heat, an evening watering is acceptable if plants are severely dry or wilted. Saving the plant is more important than following a perfect schedule.
Try to avoid frequent late-day overhead watering, especially on plants prone to leaf disease.
Water the Soil, Not the Leaves
Plants absorb water through their roots, not their flowers.
Whenever possible, water at the base of the plant.
Best methods include:
- Watering wand
- Drip irrigation
- Soaker hose
- Slow hose at the soil line
- Self-watering containers
Less ideal methods include:
- Quick overhead spraying
- Light daily misting
- Watering only the flowers
- Sprinkling mulch without soaking soil
Wet flowers can get messy, and wet foliage can increase disease pressure on some plants.
Rain Does Not Always Count
A light rain may wet the mulch but not the root ball.
Use a rain gauge or a small straight-sided container to track rainfall. If you receive only a light shower, many new plantings may still need supplemental water.
After rain, check the soil near the root ball. If it is dry a few inches down, the plant still needs water.
Fertilizer and Watering Go Together
Annuals in containers and hanging baskets need regular feeding because nutrients wash out as you water.
This is especially true for patio pots and hanging baskets that are watered daily.
A hungry annual may look pale, tired, or less floriferous even if it is being watered correctly.
Use a slow-release fertilizer at planting and/or a liquid fertilizer through the season, following label directions.
Do not fertilize a bone-dry or severely wilted plant. Water first, let the plant recover, then fertilize later if needed.
Extreme Heat Watering Guide
During stretches of extreme heat, newly planted plants, annuals, containers, and hanging baskets may need much more attention.
Hot sun, wind, reflected heat from patios or driveways, and nearby tree roots can all dry soil faster.
During heat waves:
- Water early in the morning.
- Check containers and baskets again in the afternoon.
- Move small pots into afternoon shade if possible.
- Take down hanging baskets during the hottest part of the day if they are struggling.
- Avoid fertilizing severely wilted or dry plants.
- Do not prune heavily during peak heat unless removing dead material.
- Water the root zone, not just the leaves.
- Check the soil before assuming a wilted plant needs more water.
Afternoon wilting during extreme heat does not always mean the plant is dry. Some plants wilt temporarily to conserve moisture and recover in the evening.
If a plant is still wilted in the morning, or if the soil is dry several inches down, it likely needs water.
Extreme Heat Plant Triage: What to Water First
When everything is dry and you cannot water it all at once, prioritize plants in this order.
1. Newly Planted Trees, Shrubs & Perennials
These are the highest-value plants and the hardest to replace. Their roots are not established yet, so they need help first.
2. Hanging Baskets
Baskets dry out faster than almost anything else. They have limited soil, lots of top growth, and exposure to wind and heat on all sides.
3. Containers in Full Sun
Patio pots, porch pots, and containers on pavement heat up quickly. Dark-colored pots and small pots dry especially fast.
4. Newly Planted Annuals in the Ground
Freshly planted annuals have not rooted into the surrounding soil yet and can crash quickly in heat.
5. Vegetable Gardens & Fruiting Plants
Tomatoes, peppers, cucumbers, squash, melons, and other fruiting crops need consistent moisture to keep producing well.
6. Established Annual Beds
Established in-ground annuals can usually handle short dry periods better than baskets and containers, but they still need deep watering during prolonged heat.
7. Established Shrubs & Trees
Healthy established plants can often wait longer, but during drought they still benefit from deep watering, especially evergreens, hydrangeas, dogwoods, Japanese maples, and anything planted within the last two years.
Emergency Care for a Wilted Annual or Container Plant
If an annual, container, or hanging basket is badly wilted:
- Move the container or basket into shade if possible.
- Water slowly and thoroughly.
- If the root ball is very dry, water once, wait 5–10 minutes, then water again.
- Do not fertilize while the plant is wilted.
- Wait to trim until the plant has had time to rehydrate.
- Once it perks back up, remove dead flowers or crispy leaves.
- Resume regular watering and light feeding once the plant is stable.
If the plant does not recover overnight, check whether the soil is bone dry, soggy, or compacted. Both too dry and too wet can cause wilting.
Signs a Plant May Need Water
A plant may be too dry if you see:
- Wilting in the morning
- Crispy brown leaf edges
- Curling leaves
- Dropping leaves
- Dry soil several inches down
- Soil pulling away from the root ball
- Flowers fading quickly
- Containers feeling very light
Afternoon wilting during extreme heat does not always mean the plant is dry. Always check the soil before watering again.
Signs a Plant May Be Getting Too Much Water
A plant may be too wet if you see:
- Yellowing leaves
- Wilting even though soil is wet
- Mushy stems
- Sour-smelling soil
- Fungus or algae on the soil surface
- Leaves dropping while still soft
- Root rot symptoms
Too much water can look surprisingly similar to too little water. This is why checking the soil is so important.
Special Tips for Keeping Annuals Happy in Heat
Use larger containers when possible. Bigger pots hold more soil and dry out more slowly.
Group containers together. Plants grouped together shade each other and reduce moisture loss.
Add mulch to large containers. A light layer of mulch can help keep roots cooler and reduce evaporation.
Give afternoon shade when possible. Even sun-loving annuals may appreciate relief from harsh late-day sun during extreme heat.
Deadhead and lightly trim tired plants. Removing spent blooms helps many annuals redirect energy into new growth and flowers.
Avoid fertilizing bone-dry plants. Water first, let the plant recover, then fertilize later.
Common Watering Mistakes
Mistake 1: Watering a little every day
This often encourages shallow roots and does not soak the root ball.
Mistake 2: Assuming rain was enough
A light rain may not reach the root ball, especially on newly planted shrubs and trees.
Mistake 3: Watering the leaves instead of the roots
Plants need water in the soil, not on the flowers.
Mistake 4: Not checking under the mulch
Mulch can hide dry soil underneath.
Mistake 5: Forgetting plants near large trees
Large tree roots compete heavily for moisture.
Mistake 6: Letting containers get bone dry
Once potting mix dries completely, it can be difficult to rewet.
Mistake 7: Watering too often in heavy clay
Clay soil can stay wet and reduce oxygen around roots. Always check before watering again.
Mistake 8: Planting too deeply
Plants planted too deep are more likely to struggle, even with good watering.
Quick Watering Reference
Newly Planted Perennials
Check daily at first. Water when the root ball begins to dry. After establishment begins, water less often but more deeply.
Newly Planted Shrubs
Check at least once or twice per week. Water deeply when soil is dry several inches down. Increase checking during heat, drought, wind, or tree-root competition.
Newly Planted Trees
Water thoroughly after planting. Monitor weekly during the first two growing seasons. Water deeply over the root ball at first, then expand outward as roots grow.
Established Perennials
Water during dry spells, especially if they wilt in the morning or show crispy edges.
Established Shrubs
Water deeply during long dry periods. Focus on the root zone, not just the base.
Established Trees
Water during severe drought, especially valuable ornamentals, evergreens, and trees planted within the last few years. Water slowly over a wide area under the canopy.
Annuals in the Ground
Check frequently after planting. Once established, water deeply when soil is dry a few inches down. During heat, check more often.
Containers
Check daily in summer. Water until water runs from the drainage holes.
Hanging Baskets
Check daily, sometimes twice daily in extreme heat. Rewater very dry baskets after a short pause so the root ball can fully rehydrate.
During Extreme Heat
Water new plantings, baskets, and containers first. Water early, check again later, and move struggling pots into shade when possible.
Final Takeaway
Successful watering is not about watering the most often. It is about watering the right way.
Deep, slow watering helps roots grow stronger, deeper, and farther into the surrounding soil. A well-rooted plant can handle heat, drought, and stress much better than a plant that has only been lightly sprinkled on the surface.
For annuals, containers, and hanging baskets, consistent moisture is key because they dry out faster and work hard all season.
For shrubs and trees, deep watering during establishment is what helps them develop the roots they need for long-term success.
When in doubt, check the soil before watering.
Moist, not soggy, is the goal.



 sunny corner that could use more color, or a shady area where nothing seems to quite work.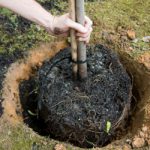
 asters, and other late-blooming perennials can keep a landscape colorful long after many summer plants have finished.

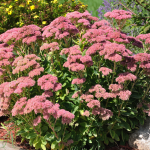
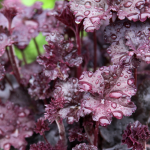
 provide nectar, pollen, shelter, and sometimes food for caterpillars. It can be wild and natural, neat and cottage-like, or beautifully designed for curb appeal. The best pollinator garden is one that fits your space, your style, and your life — and then grows from there.
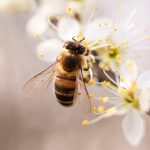 matter.
 helping plant flowers in a container.