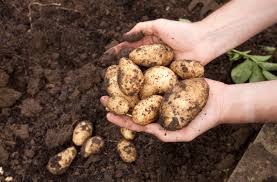
Have you ever tasted home grown potatoes? Most say there is no comparison to store bought potatoes. Home grown potatoes are fresher, more flavorful and healthier for you. A small number of seed potatoes will yield buckets of potatoes ready to eat and enjoy and can even be stored throughout the winter months
Soil Requirements
- Potatoes must have well-drained, moisture retentive, fertile soil that is high in organic matter and a pH between 5.0-6.0. Do not use a lime soil, the soil should be slightly acidic.
- To prevent disease problems, do not plant potatoes in the same area as tomatoes.
- Potatoes should be rotated on a 3 year program.
WHEN TO PLANT POTATOES
Potatoes prefer cool weather. Typically for our Zone 6, St. Patrick Day is a great time to start planting potatoes. You should always remember….
- The soil, not the calendar, will tell you when it’s time to plant. The soil should not be so wet that it sticks together and is hard to work. Let it dry out a bit first. Like other seeds, potato seed pieces will rot if planted in ground that’s too wet.
- Soil temperatures should be reaching the 50 degrees mark, before the potato would start to grow.
Seed Potato Preparation
- Before planting place your seed potatoes in a warm location (between 60-70 degrees) in full
 sun, such as a kitchen window sill for one to two weeks. This will induce sprouting to make it easier in the following steps.
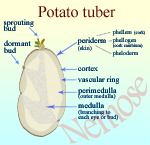
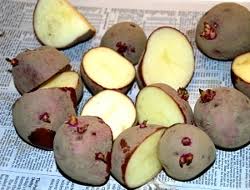
 - one day before planting take a sharp, clean knife and cut the potato into planting pieces or “seeds”. Each piece should be approximately 1.5″-2″ and must contain at least 1 or 2 eyes. (Eyes can be identified as the indentations or dimples on a potato. These indentations lead to sprouting buds, that will eventually make there way to the soil surface and be the stalk to the potato leaves.) Small potatoes with a minimal amount of eyes may be planted whole.
- Allow “seeds” to dry (1-2 days) and form a callous over their cuts.
Planting Tips
- Dig a tench 12″ deep and add compost at the bottom of the trench where it will be most beneficial to the newly forming roots.
- Place potato seeds 18″ apart (if intensive planting 9″ diamond pattern) and 4″ deep inside the trench, with the cut side down and eyes pointing upwards. Don’t fill the trench completely.
- Depending on the soil temperature, stems will emerge from the potato seeds with in two weeks. At this time add another 3-4″ of soil into the trench.
- After another 2-3 weeks add 3-4″ more of soil on top and around the potatoes.
- Monitor the potatoes, add soil or mulch (pine mulch or straw) as needed to ensure new potatoes forming are not exposed to sunlight. If young potatoes are exposed while developing , they will turn green. This green portion may be toxic if eaten.
- Water you potatoes well and frequently, keep them weed free (as weeds steal nutrients from them).
Helpful Tips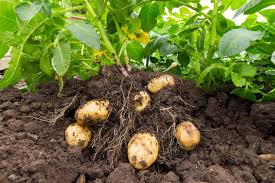
To mazimize your crop, keep potatoes well watered throughout the Summer, but especially during the period when they are in flower and immediately thereafter. Water early in the day, this allows foliage to dry completely before the evening.
Potatoes grow great in containers and Potatoes Bags!
The best starters are seed potatoes. Do not confuse seed potatoes with potato seeds or grocery produce! Select seed potatoes which have protruding eyes (buds).
Harvest Time
In general potatoes should not be harvested until two weeks after the foliage has died back. This allows the skin to set and reduces skin peeling, bruising and rotting while in storage. After harvesting immediately store in a cool, dry and dark place.
Gently dig around the plant and pull up the largest potatoes (for cooking use) and allow smaller ones to remain in the ground and keep growing.
If by the end of September the foliage has not died back, all of the foliage should be cut to the ground to ensure the crop has ample time to mature before winter.