Extend the beauty of your garden with vivid autumn-blooming perennials. When you think of fall-blooming plants, don’t stop at mums – there are many perennials that can add color to your yard at this time of year.
Top Autumn Bloomers
While there are different autumn-blooming perennials for different growing zones and climate conditions, some of the most popular and widespread options include…
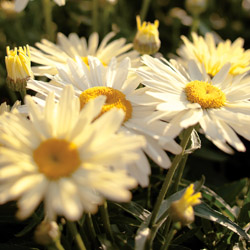
- Fall Daisies
For fall daisies (besides daisy mums!) grow Boltonia or Nippon Daisy. Boltonia is a tall (3-4′) grower, suitable as a background plant. White or pink daisies are borne in profusion atop fine grey-green foliage. The Nippon Daisy (Chrysanthemum nipponicum) is covered with large crisp white daisies in October. Both love lots of sun and make excellent cut flowers. - Autumn Sedums
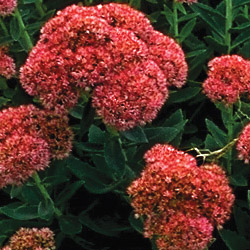
Bold-foliaged sedums provide texture as well as color in a sunny place. Sedum ‘Autumn Joy’ is the most well known. It has coppery-pink flower heads. Sedums ‘Brilliant’ and ‘Stardust’, with soft pink and white flowers respectively, are also attractive. For a totally different color combination plant sedum ‘Vera Jameson’. It has gray-purple foliage with rose pink blooms and looks stunning when planted with Blue Fescue, Artemesia Silver Mound and other silver-foliaged plants. As an added bonus, all the sedums are attractive to butterflies. - Autumn Asters
Asters are another fall bloomer that butterflies love. These perennials like sun and moist, well-drained soil. There are many colorful aster varieties in shades of pink, purple, blue and white. Some favorites include tall-growing aster ‘Alma Potschke’ with bright pink flowers, blue-flowered aster ‘Professor Kippenburg’ and low-growing aster ‘Purple Dome’ with its deep purple blooms. - Autumn Goldenrod
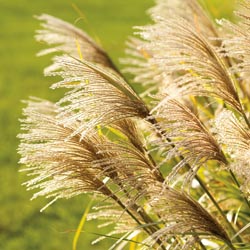
Sunny yellow goldenrod (Solidago) is another bright addition to the fall garden. Wrongly blamed as the cause of fall allergy problems, goldenrod has rightly taken its place in the fall garden. It looks particularly effective combined with blue flowering plumbago, purple asters and ornamental grasses.
Fall Bloomers for Shade Gardens
Even shade gardeners can enjoy late blooming perennials. Tall growing Japanese Anemones are a stately addition to the perennial garden. Bloom colors range from pure white to various shades of pink, and flowers can be single, semi-double or double blooms. Anemones grow well in light to moderate shade and spread quickly to form large clumps, filling in space vacated by spent summer plants. Turtlehead (Chelone) is another fast spreader for shade. Rose pink flowers cover the tops of the plant from early September to October. For a deeply shaded location, try Toad Lily (Tricyrtis), which has clusters of beautiful cream flowers, spotted with maroon along its upright stems. For light shade, plant Blue Cardinal Flower (Lobelia siphilitica), whose intense blue spikes can be admired from mid-August until frost.
No matter what type of garden you have, the end of summer does not need to mean the end of colorful blooms. Instead, just opt for amazing fall bloomers and enjoy brilliant color even longer!