Celebrate the season with your feathered friends by decorating a tree in your yard, or even one in a container, with special treats they’ll love.
Bird-Friendly Ornaments
There are several types of delicious “ornaments” birds will love, and they can be fun, easy projects to brighten up a winter day.
- Pine Cone Feeders
Pine cones are easy to turn into impromptu bird feeders. Gather some pine or spruce cones. Tie a loop of twine or colorful holiday yarn around the top to use as a hanger. Fill the crevices with peanut butter, then roll in bird seed or cornmeal. - Orange Halves
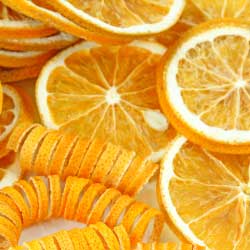
Don’t toss out that orange rind – turn it into a bird feeder! Fill scooped out orange halves with a mixture of peanut butter, suet and seed. Poke a length of wire, yarn or twine through the top to attach to the tree. Coconut halves are another great option. - Bird Cakes and Muffins
Make “bird cakes” to set in the branches: Melt 2 cups of suet in a saucepan. Mix in 2 cups of peanut butter and several cups of cornmeal, until the mixture is soft but not too sticky. Spoon mixture into muffin cups and decorate with black oil sunflower seed. Cool before using.
Great Garlands
What’s a holiday tree without garland? To make a bird-friendly, edible decoration, string unsalted, unbuttered popcorn on lengths of heavy-duty thread, twine or yard (avoid fishing line that birds can get tangled in too easily). For more color and variety, add whole peanuts, cranberries, grapes and raisins to the garland as well, or even a few loops of whole grain, unsweetened cereal such as plain Cheerios. You can even include other dried fruits, but avoid any seasoned or sweetened options (those foods aren’t good for birds). Weave your edible garland among the branches.
And Lastly, the Tree Topper!
Top your bird-friendly feeder tree with a grapefruit “star” the birds will love. Slice the ends off a grapefruit, leaving a 1″ slice in the middle (use the ends to fill with seed or peanut butter mixture, a larger version of the filled orange halves). Wire 5 cranberries around the edge of the slice to form the points of a star, trimming away the excess rind in between if desired. Then, wire the whole thing to the top of your tree.
Now stand back and watch as your feathered friends enjoy their holiday feast!