Monthly Archives: February 2017

Summer Lavenders

Do you enjoy making herbal or floral bouquets and wands to scent the house? Maybe you’re into the lavender cooking trend or like to infuse playful summer drinks with a floral touch. Perhaps you recognize the aromatherapy or medicinal qualities of lavender.

In other words, do you love lavender and are frustrated because the bloom season is so short?

Whatever you do with your lavender, you may have planted one and it bloomed for a few weeks. Now you think you have to wait another year to enjoy the beauty and fragrance. That’s no fun! But here’s a secret to prolong your passion during lavender season…

About Lavenders

There are actually three groups of lavenders. Members of each group bloom around the same length of time, but each group blooms at different times. By planting at least one member of each group, you can enjoy lavender from early spring to mid-summer (and sometimes even longer with careful watering).

Members of the “Non-English Lavenders” bloom from early to late spring. “English Lavenders” follow and bloom from late spring to early summer. True summer lavenders, known as “Lavendins,” continue blooming into the hottest days of summer.

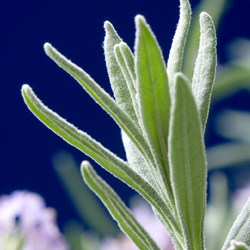
Also called “English Lavender hybrids,” the varieties in this summer group are crosses between the Portuguese and English Lavenders. They all have large gray leaves, grow into large plants, and grow best in the heat. They are all very fragrant, making them welcome additions to any lavender garden.

Abriali Lavender was one of the first hybrids. It produced cosmetic-grade oil until Grosso Lavender replaced it with superior oil production. Happily, gardeners can also enjoy Grosso in their gardens, as it’s frequently available at garden centers.

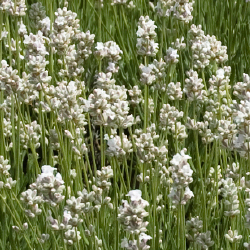
White Grosso Lavender, with the same beauty and fragrance, provides a nice background for a mixed flower border. Edelweiss Lavender, a smaller white lavender, mixes nicely in the garden, without a reduction of fragrance.

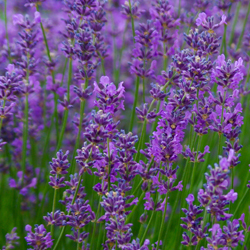
Hidcote Giant Lavender and Provence Lavender are garden center favorites. Approximately the same size, the Hidcote Giant has darker flowers than the Provence, which has a longer flower wand. Sachets usually contain Provance buds because they are exceptionally easy to remove from the stalk. Other popular varieties include Grappenhall, Dutch Mill, Seal and Fred Boutin lavenders.

Lavenders In the Garden

Growing lavenders could not be easier. All thrive in full sun in warm, well-drained, average quality soil. Dampness, either through poor drainage or humidity, will kill them. They grow well in pots with good drainage and fair soil. Prune after blooming to shape the plants and promote future blooming. While lavender is drought resistant, if the soil is dry, it is necessary to water well. Water again only when the soil is dry. Using compost as fertilizer will provide critical nutrients and improve soil drainage.

Using Lavender

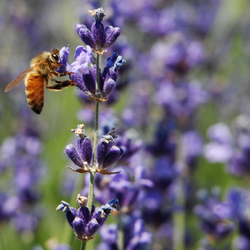
Lavenders are very attractive to bees. They happily buzz from flower to flower while collecting pollen. Some honey producers site their hives in the middle of lavender fields to produce lavender-scented honey. The honey’s aroma is a great way to start the day!

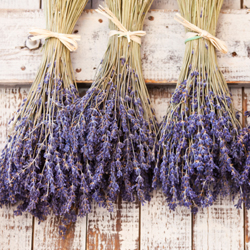
Drying lavender for future use is easy. Cut bundles of wands from the plants without cutting into the older woody part of the plant. Use a rubber band to hold the bundles together and hang them upside down in a dark, dry room such as an attic or closet. The darkness helps retain the bloom color. The bundle should be dry in 7-10 days.

Although lavender’s taste isn’t the same as its fragrance, lavender dishes appear in many trendy restaurants. Lavender martinis and teas, ice cream, cookies and other desserts accompany lavender-sauced meats and vegetarian dishes. Lavender is an ingredient in the herbs de Provence mix and replaces strong tasting herbs such as rosemary, thyme or mint in many cookbooks for meats, breads and general seasonings.

Some folks even use lavender as an antibacterial antiseptic to treat wounds and insect stings.

Even if you just want to enjoy lavender for the sake of its beauty and ease of maintenance, remember… Planting one of each of the three groups lets you love your lavender for three times as long. Enjoy!
Watering When Away

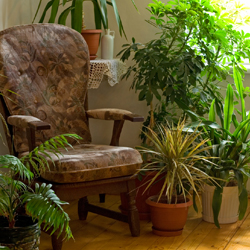
It’s vacation time! You’re going to be gone for two weeks or more, your friends, neighbors and family members are all busy and the weatherman says it’s going to be “hot, hot, hot.” What about your houseplants?

Fear not! A few minutes of thoughtful planning and a quick trip to the garden center will ensure meeting your plants’ watering requirements even when you can’t be home for daily moisture checks. Popular and effective solutions include…

  • Pre-Watering: Before you leave on your trip, make sure your plants are well-watered. Many houseplants can withstand some watering neglect, and if you aren’t gone too long, they may not need any supplemental solutions if you’re watered them right before your trip. Take care not to overwater, however, or you could be compounding the problem.
  • Anti-Drought Solution: Prior to leaving, water with an anti-drought solution. It temporarily forces the plant into dormancy. This reduces the water requirement for roughly two weeks (effective control will vary by product and plant type) while the solution gradually wears off. This can affect blooming or growth periods, however, so read instructions carefully and use the solution exactly as directed.
  • Self-Watering Containers: Planting your houseplants in self-watering pots is truly looking ahead. A reservoir holds water under the pot, and this water gradually travels to the soil via a wick, always keeping the soil moist so long as the reservoir contains water. If you want to use a specific pot without a built-in reservoir, use a conversion kit. Various sizes are available and some use fill tubes. Consider adding liquid fertilizer to the reservoir water to ensure your plant gets proper nutrition while you are away.
  • Individual Pot Drippers: These generally hold water above the plant. Various sizes and styles provide water to small and large pots. From beautiful blown glass globes to simple plastic bottles, these allow water to drip down into the soil through a drip-tip inserted in the soil. One style even looks like a flask attached to the side of the pot with a tube dripping water to the soil. Because they show above the plant, many people only use them during their vacation.
  • Automatic Watering Systems: These are more elaborate but very effective options. A large water reservoir feeds to clustered houseplants through small tubing attached to drippers inserted in the soil. Larger pots use two or more drippers. These systems pump water on a regular basis using a battery and timer, making them ideal for regular watering when you may be taking a longer trip. These also allow liquid fertilizer in the reservoir so your plants are properly nourished.

Go ahead and enjoy your trip…your plants should be fine!

Butterfly Bush

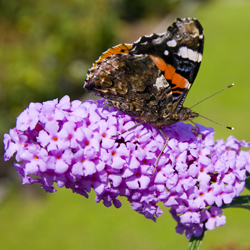
What could be more enjoyable than relaxing in your favorite lawn chair or hammock, your sunglasses on and a cool beverage in hand, staring at an enchanting array of colorful butterflies milling around their favorite plant? What could possibly be an easier way to accomplish this vision than by planting a simple butterfly bush?

About Butterfly Bush

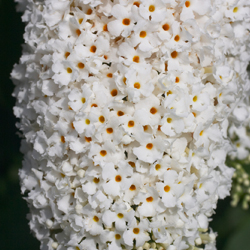
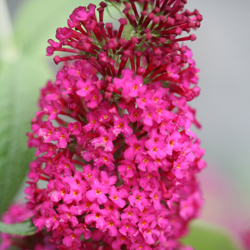
Buddleia davidii, the butterfly bush, is a flowering maniac. It pushes its proliferation of perfumed blooms straight through summer and well into fall, providing nourishment to butterflies all season long. Available in a multitude of colors ranging from white to pink to red to purple, there are colorful butterfly bushes to match any garden or landscape color scheme. The fragrant, long, spiked panicles are borne in profusion on long, gracefully arching branches that add drama and elegance to the yard. And it really is a butterfly magnet!

Growing Butterfly Bush

This quick growing, deciduous, woody shrub is winter hardy in zones 5-10. In the northernmost areas of its hardiness range, Buddleia behaves like a herbaceous perennial, dying back to the ground in very cold winters. In the southernmost areas, Buddleia is grown as large shrub and can flourish all year. In either location, however, you should treat this plant as a cut back shrub. Because butterfly bush blooms on new wood, it benefits the plant to be cut back to the ground each spring. This judicious pruning will stimulate lavish new growth and an abundance of flowers. It will also keep some of the larger varieties at a manageable size, particularly in smaller yards, corners or other confined spaces.

Plant your butterfly bush in full sun in just about any type of soil and it will thrive. Don’t worry about fertilizing as over-fertilization can encourage too much leaf growth over flower formation. Deadheading will encourage additional growth and new flower buds to extend the blooming season. Buddleia has a good tolerance for drought once established, but should be carefully watered when young. A good, thick layer of mulch will help maintain soil moisture and keep weeds down to keep the shrub healthy. Just be sure not to use insecticides or pesticides on your butterfly bush or you may be harming the very fluttering fliers you hope to attract.

Not sure which butterfly bush to try? Consider these varieties to choose the perfect color and style to suit your yard.

Recommended Buddleia Varieties

The “Miss” Series are all non-invasive, and get to be about 4 foot tall

‘Miss Molly’ – Intense almost red flower

‘Miss Ruby’ – Brilliant rich pink flower

‘Miss Violet’-  Perfectly Purple blooms

The Pugster Series have full size flowers on dwarf plants that only get 2 foot tall

‘Pugster Blue’ a nice true blue flower

‘Pugster pink’ a light pink bloom

‘Pugster Amethyst’ a amethyst toned flower


The N-P-K of Fertilizer

Once upon a time, Mary, Mary, Quite Contrary grew her garden with silver bells and cockleshells, but nowadays, most gardeners use some other forms of fertilizer that are better formulated than nursery rhymes. But what important components make up a fertilizer, and why are those components important for your plants?

Understanding Fertilizer

Simply put, a fertilizer has nutrients to make a plant grow better. Years ago, farmers used composted manure, ashes and urine. Today, most of us buy our fertilizer, but a trip to the store can be confusing. What do those numbers on the fertilizer bag mean? Should I buy liquid or granular? Which is better, slow or quick release? Let’s investigate…

Without getting too technical, the three numbers show the percentage of available nitrogen (N), phosphate (P) and potassium (K) in a fertilizer blend. By law, it always goes in that order. If you see a fertilizer with 20-5-10, it means the fertilizer contains 20 percent available nitrogen, 5 percent phosphate and 10 percent potassium. Other nutrients and filler make up the difference and are often chosen for specific types of plants, such as roses or flowers, vegetables, trees, etc.

What does that mean to your plants?

  • Nitrogen promotes chlorophyll, producing greener, more quickly growing plants. If your plants aren’t as green as they should be, use a fertilizer with nitrogen. Most lawn fertilizers have a relatively high nitrogen content and cause mowing to be more frequent as lawns “green up” and grass blades grow more quickly.
  • Phosphate improves root growth, flowering ability and bloom size. Use a fertilizer with a larger middle number (phosphate percentage) to encourage root growth during transplanting or to encourage blooms. This is especially important when initially planting so root systems become strongly established.
  • Potassium enables the photosynthesis process and improves plant resistance to cold spells, drought and insect attacks. Many people use a potassium fertilizer when the seasons change to help plants resist the stresses of those transitions.

Liquid or Granular? Fast or Slow?

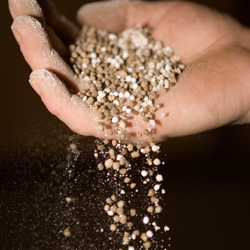
Fertilizers come in liquid and granular forms. Generally speaking, liquids are highly concentrated and need to be mixed with water before being fed to plants, but they are absorbed more quickly and are easy to apply more evenly. Granular formulas have small beads or grains that must be spread around and watered into the soil, and it can be difficult to spread an even layer over large areas unless a spreader is used. Granular forms need time to dissolve or decompose before they can be absorbed, but they last longer in the soil and can nourish plants for weeks or months.

Similarly, fertilizers come in fast or quick release forms as well as slow release forms. Both can work well in any garden, depending on your fertilizing needs, plant nutritional requirements and condition of your soil.

Read the label carefully for specific instructions and uses. It may seem boring, but reading that label will prevent bad results, as overuse or misuse of fertilizer can kill your plants, upset the balance of your soil and even cause environmental contamination – not the results you planned. Once you know more about fertilizer and how to use it correctly, however, you’ll enjoy the results this extra treat can give to your garden.

Edible Flowers

Flowers aren’t just for beautiful dining table centerpieces anymore! For all you “foodies” out there, who also love flowers, are you aware that there are numerous blooms that are not only edible but also delicious? Flowers make a striking, colorful, textural and flavorful addition to soups, salads, baked goods and more.

Safety First

There are just a couple of things to keep in mind when experimenting with unfamiliar flowers. Not all flowers are edible and some can be poisonous, even in small tastes. Be certain to clearly identify your flowers and accept no imposters, as some blooms can look very similar. Also, it is best to use flowers that have not been sprayed with chemicals – either fertilizers or pesticides. The best way to avoid both of these issues is to grow your own edible flowers from seed, keeping them conveniently in a kitchen container garden or safely on a deck or patio where there’s no risk of contamination or misidentification.

Favorite Edible Flowers

There are surprising blooms that can be tasty accents to your favorite dishes. For the best flavor and freshness, harvest blooms at their peak early in the day. Younger and older blooms or blooms of different sizes often have subtly different flavors, so be sure to experiment to find your favorites.

  • Bee Balm (Monarda didyma) – Tea-like flavor, flowers in white, pink, red and lavender
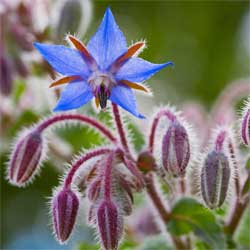
  • Borage (Borago officinalis) – Cucumber-like taste, flowers in lavender, purple and blue
  • Calendula (Calendula officianalis) – Peppery taste, flowers in yellow, orange and gold
  • Chive (Allium schoenoprasum) – Onion flavor, flowers in white, pink and lavender
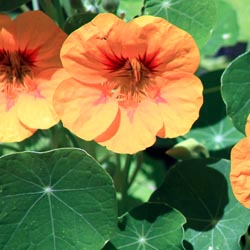
  • Nasturtium (Tropaloum majus) – Peppery flavor, flowers in white, yellow, orange and red
  • Pineapple Sage (Salvia eleagans) – Sage flavor with pineapple undertones, flowers in scarlet
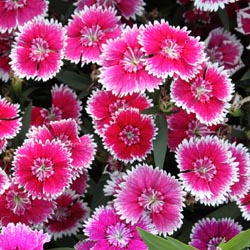
  • Pinks (Dianthus spp.) – Clove-like flavor, flowers in white, pink and red
  • Red Clover (Trifolium pretense) – Sweet tasting, flowers in pink and red
  • Signet Marigold (Tagetes tenufolia) – Citrus taste, flowers in white, yellow, gold and red
  • Viola or Pansy (Viola spp.) – Sweet flavor, flowers in a multitude of colors

Not sure which recipes to try? Flowers make surprising accents to salads or garnishes for cakes, cookies and ice creams. Add flower petals to a favorite drink, or freeze blooms in ice cubes for colorful cooling. There are even recipes available for sauces, salsas, marinades and more, all with more taste and color thanks to edible flowers. Bon appétit!

EdibleFlowers_4EdibleFlowers_1EdibleFlowers_2

Tomatoes and Peppers – A Gardening Tradition

Tomatoes and peppers are two crops you can never have too much of. They freeze well without the difficulty of blanching, and although the texture of tomatoes disintegrates, the flavor remains good. Both tomatoes and peppers offer brilliantly colored fruit that can be particularly attractive in the garden or in containers. Both have the same requirements – a sunny, nutrient-rich site that is well-drained. To prevent disease problems, neither should be planted in a location where tomatoes, peppers or eggplants were grown the previous year. If you’re not growing both tomatoes and peppers, you’re missing out!

Tomatoes

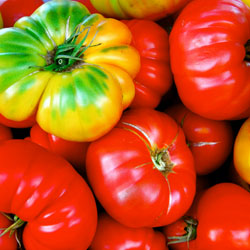
Tomatoes come in two different types: determinate and indeterminate. Determinate, or bush varieties, grow 1-3’ tall. When flowers form at the vine tips, the plant stops growing. This means fruit sets all at once – which makes them excellent for canning. Indeterminate types, on the other hand, have sprawling vines that grow 6-20’ long, and keep producing and growing until frost. Indeterminate vines should be pruned to ensure that they do not put too much energy into vine production. Pinch out sideshoots (“suckers”) as they develop to prevent excess growth and encourage more fruit.

Tomato plants should be set deep in the soil with the first leaf just above ground level. Leggy plants can even be planted horizontally as roots will develop from the planted stem.

Blossom-end rot can be a common problem with tomatoes. It is a leathery scar that develops on the bottom of the fruit. This is caused from a deficiency of calcium and/or irregular watering. To ensure a supply of calcium, work BumperCrop soil amendment into the soil before planting and maintain regular watering. Feed tomatoes once a month with BumperCrop Vegetable food. Apply mulch around all vegetable plants to help keep the soil moist and cool.

Another disease, early blight, makes dark, depressed areas on the leaves just as first fruit appears. Late blight appears as black, irregular, water-soaked blotches on leaves and dark-colored spots on fruits. Both diseases usually occur during cool, rainy weather. Destroy plants to keep from infecting other plants and select resistant varieties to minimize future outbreaks.

Spread by aphids, tobacco mosaic virus will appear as yellow, mottled foliage with fruit possibly being stunted. Severely affected plants should be destroyed. Aphids should be controlled to prevent infection.

Peppers

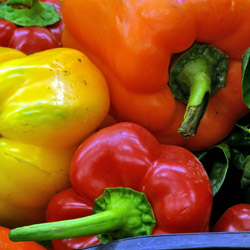
Ranging in selections from crispy sweet to fiery hot and from big and blocky to long and skinny, peppers should be cut from the plant rather than pulled off. Most sweet peppers become even sweeter when they mature as they turn from green to bright red, yellow, orange or even brown or purple. As hot peppers mature and turn red, they get hotter.

Peppers are also susceptible to blossom end rot and tobacco mosaic virus the same as tomatoes. The same measures should be taken to prevent infection.

Although we’ve touched on the most common problems with tomatoes and peppers – if you’re not sure, bring in a sample to let one of our experts correctly diagnose the problem and help you find a solution.

Types of Tomatoes & Peppers -below are a few we may carry visit our product page for a an updated list. 

Tomatoes

  • Beefsteak – Large slicer
  • Better Boy (VFN) – Medium
  • Big Beef – Large slicer
  • Big Girl (VF) – Medium
  • Celebrity (VFNTA) – Medium
  • Champion (VFNT) – Large
  • Early Girl (VF)- Medium, early
  • Husky Gold (VF) – Medium yellow
  • Husky Red (VF) – Medium
  • Lemon Boy (VFN) – Yellow
  • Patio – Self-supporting, medium
  • Roma (VF) – Medium
  • Sunray – Yellow
  • Supersonic – Medium to large
  • Supersteak – Large slicer
  • Sweet 100 – Cherry

Notations after the tomato variety designate their resistance to the following diseases: V-Verticillium, F-Fusarium, N-Nematodes, T-Tobacco Mosaic, A-Alternaria

Peppers

  • Biscayne Italian Fryer – Sweet
  • California Wonder – Sweet
  • Cherry Hot – Hot
  • Cubanelle – Sweet
  • Golden Bell – Sweet
  • Habanaro – Hot
  • Hungarian Wax – Hot
  • Italian Gourmet Fryer – Sweet
  • Ivory Bell – Sweet
  • Jalapeno – Hot
  • Jupiter Green – Sweet
  • Lady Bell – Sweet
  • Lilac Bell – Sweet
  • Long Hot Cayenne – Hot
  • Mandarin (Orange Bell) – Sweet
  • Sweet Banana – Sweet

In The Kitchen

There are hundreds of delicious recipes to try with either tomatoes, peppers or both at once, whether they are fresh or canned. Try this favorite tomato recipe, and use your strong crops of both of these fruits to experiment with different flavors and tastes all year long!

Scalloped Fresh Tomatoes

  • 1 medium onion, chopped
  • 2 Tbsp butter or margarine
  • 4 medium, ripe tomatoes, sliced
  • 1 cup grated sharp cheese
  • 1 cup fine, soft bread crumbs
  • 1 cup dairy sour cream
  • 2 eggs, well-beaten
  • ½ tsp salt

Cook onions in butter until tender. Place half the tomatoes in a 10 x 6 x 11 ½” baking dish. Top with half each onions, cheese and crumbs; repeat. Mix remaining ingredients. Pour over top. Bake at 350 degrees for 35-40 minutes. Serves 4-5.

tomato-pepper-2OLYMPUS DIGITAL CAMERA

Espalier

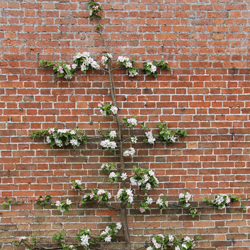
Espalier is the process of training trees or shrubs, by pruning and trellising, to create a vertical, two-dimensional, formal pattern. The purpose of espalier is to artfully train a tree to grow in limited space, to provide pattern and texture on a solid wall, to grow fruit in a limited space and to create privacy in the garden.

It is possible to purchase plants that have been already been espaliered, however, your selection of plant choices will be limited and it’s not nearly as much fun as doing it yourself. Fortunately, it’s not as hard to do as it may sound!

Espalier Basics

To begin, choose a spot in full sun where you have garden space at the foot of a bare wall or fence. It is important to remember to leave about 6 inches of space between the wall or fence and the plant to allow sufficient room for roots to grow. A wire frame is often used in place of a trellis when choosing this type of plant training, though a trellis may be used when training a plant for privacy when no wall is available. Screw eyebolts into the side of a building at 1-foot intervals, horizontally and vertically. Tie wire between the bolts to create a grid. There are many styles and patterns, of espalier to choose from, some simple, some complicated. It may help to layout your design on graph paper first to solidify your plan and to visualize its complete form.

Select a tree that is young as its branches will be more flexible and more readily trainable. All branches must be pruned from the side that will be flush with the wall or trellis. Tie the main trunk to the wire grid with a twist tie, then prune away all branches that grow forward leaving only laterally spreading branches. Next, begin tying the lateral branches to the frame at approximately a 45-degree angle from the ground. You now have the beginnings of an espalier! This process will require annual maintenance. Branches chosen to be part of your original design should be retrained and retied yearly. Check the ties twice a year to make sure that they are not strangling the branches, and loosen them as necessary. Branches that are not needed to maintain your design should be removed.

Pruning Your Plant for the Best Espalier

Pruning and training will continue throughout the life of your chosen plant. Generally, most major pruning is done in late winter to early spring before new growth begins, but pruning at different times can have different advantages. Pruning during the dormant season or early spring, for example, will stimulate new growth that can help fill a pattern in more quickly. Pruning in mid-summer (June, July) tends to have a dwarfing effect, ideal to keep a more mature plant under control in a smaller space. Pruning should not be done in late summer, however, as this could stimulate new growth that will not have time to harden off before a heavy frost sets in.

An espalier design can take years to fill into a luxurious form, but the effort and meticulous nature of this type of plant training can be well worthwhile for a unique and eye-catching feature in your garden.

Apple Fruit.

Jump Start Your Pond

Are you ready to get your pond started up for another beautiful spring and summer? It can be a big job to rejuvenate such a large water feature so it remains balanced and healthy after a long, harsh winter, but with a few careful steps, your pond can be back in shape in no time.

When to Reopen Your Pond

It is important that you don’t try to get your pond started too early in the season. All risk of hard freezes should be long past, and even nightly frosts should be tapering off or already finished before you restart your pond. The exact time will vary based on your pond’s size, depth and location, as well as your ambient weather conditions and the pond’s overall ecology. For example, a smaller, shallower pond in a sunny area will be warmed up and ready to restart before a larger, deeper pond in a shady spot. It can be helpful to keep a journal or calendar from year to year to note when you reopened your pond and how successful your efforts were. In time, you’ll be able to adjust your calendar easily without risking the health and wellness of your pond, even if annual conditions change.

Easy Steps to Restart Your Pond

When you are ready to jump start your pond…

  • Remove the netting that was set in place last fall. If needed, clean and make repairs to the netting right away so it will be ready to use next fall. Store it safely where it will be easy to reach when needed again.
  • Remove excess sediment from the bottom of the pond with a vacuum or a net. It is not necessary to remove every bit of sediment, but most of the debris should be removed so the pump can function effectively.
  • Test last year’s pump and replace if necessary. Be sure to test any additional moving or electrical features, such as waterfalls, fountains or lighting around the pond so repairs can be made if needed.
  • If water level is low, add fresh water to desired height. Avoid overfilling the pond, however, which can disrupt the essential chemical and microbial balance that keeps the pond healthy.
  • Add de-chlorinator as necessary to remove heavy chemicals from the water that has been freshly added to the pond. As with any chemical treatments, be sure to test the water several times to be sure you reach the proper balance.
  • Place aquatic plants in the pond and begin fertilizing to meet their nutritional needs. These may be plants that you’ve overwintered in a safe location, or you may choose to add new or exotic plants in late spring.
  • Begin feeding fish when water temperature stays above 55 degrees. Keep feedings minimal at first as fish come out of dormancy, as excess food will only rot and lead to greater bacteria and algae growth in the water.

It is perfectly natural for your pond water to turn green at first, but with the proper plants it should balance itself out in no time. It may take a few days or even a couple of weeks for your pond to return to its healthy, active state, but if you’re restarted it properly, you shouldn’t have any major problems.

pond

Creepers & Crawlers: Ground Covers for Walkways

The durability of some plants is absolutely amazing. A number of them are so robust that they may even be tread on! These are the plants to choose when filling in the space between pavers, walkways, patios and steps. Placing plants in the gaps of your hardscape will soften its appearance and will keep weeds from taking over that space, as well as prevent erosion that will loosen stones. These ground covers will creep and crawl around the stone bringing the garden to your feet and closer for you to enjoy. 

There are resilient, low-growing, easy maintenance plants for just about any situation. Many even have showy flowers. But which is right for your yard? Before planting, scope out your site. Take into consideration the amount of sun or shade the plant will receive, the amount of foot traffic the area gets and the size of the space that the plant needs to fill. Still not sure which groundcover will work best? Stop in and speak with a member of our knowledgeable staff. We can help make your selection easier. 

Groundcovers for Moderate to Heavy Foot Traffic 

Areas that receive moderate to heavy foot traffic – backyard patios, front walkways, terrace steps, etc. – can be the most difficult to fill in. Depending on the light the site receives, some of the most popular groundcover options include… 

Full Sun 

  • Alpine Cinquefoil (Potentilla) – 12” spread, yellow flowers, green foliage
  • Carpet Speedwell (Veronica) – 3” spread, light blue flowers
  • Creeping Sunshine Speedwell (Veronica) – 12” spread, gold foliage
  • Creeping Thyme Doone Valley (Thymus) 23” spread, variegated gold foliage
  • Creeping Thyme Purple Carpet (Thymus) 18” spread, mauve flowers
  • Creeping Thyme Elfin (Thymus) –  8” spread, light pink flowers
  • Creeping Thyme Coccineus (Thymus) –  18” spread, red flowers
  • Creeping Thyme Pink Chintz (Thymus) 23” spread, deep pink flowers
  • Creeping Thyme Ruby Glow (Thymus) –  18” spread, purple-red flowers
  • Golden Stonecrop (Sedum) – 23” spread, yellow flowers and foliage
  • Hartington Silver Thyme (Thymus) 12” spread, light pink flowers
  • Mediterranean Creeping Thyme (Thymus) – 18” spread, deep pink flowers
  • Nutmeg Thyme (Thymus) – 18” spread, scented foliage
  • Orange-scented Thyme (Thymus) – 12” spread, scented foliage
  • Pink Pussy-toes (Antennaria) – 12” spread, deep pink flowers
  • Pussy-toes (Antennaria) 12” spread, white flowers
  • White Moss Thyme (Thymus) – 18” spread, white flowers
  • Whitley’s Speedwell (Veronica) – 23” spread, deep blue flowers
  • Woolly Thyme (Thymus) – 23” spread, grey-green foliage

Sun to Part Sun 

  • Blue Star Creeper (Isotom) 12” spread, light blue flowers
  • Black Brass Buttons (Leptinella) 12” spread, purple-black foliage
  • Black-Leaved Clover (Trifolium) – 18” spread, green and purple foliage
  • Celestial Spice Pratia (Pratia) 8” spread, deep blue flowers
  • County Park Pratia (Pratia) – 12” spread, deep blue flowers
  • Creeping Mazus (Mazus) – 18” spread, mauve flowers
  • Creeping Wire Vine (Muehlenbeckia) – 29” spread, wiry stems
  • Cushion Bolax (Azorella) – 8” spread, yellow flowers
  • Green Brass Buttons (Leptinella squalida) – 12” spread, yellow flowers
  • Irish Moss (Sagina subulata) – 12” spread, small white flowers
  • White Creeping Mazus (Mazus) – 18” spread, white flowers
  • Miniature Brass Buttons (Leptinella) – 16” spread, white flowers
  • Rupturewort (Herniaria) – 12” spread, tiny leaves
  • Scotch Moss Golden (Sagina) 12” spread, golden foliage
  • Turkey Tangle Fogfruit (Phyla) 23” spread, gray-green foliage
  • White Creeping Pratia (Pratia) 12” spread, white flowers 

Shade 

  • Corsican Mint (Mentha) – 12” spread, mauve flowers
  • Miniature Creeping Jenny (Lysimachia) – 18” spread, yellow flowers
  • Miniature Wintercreeper (Euonymus) – 18” spread, leathery foliage
Off The Beaten Path

Planting Basics – Trees & Shrubs

Are you ready to add trees and shrubs to your landscape? You don’t need to hire professionals to do the planting when you learn the basics of doing it the right way yourself.

Soil Preparation

How quickly and how well trees become established once they are planted is affected by the amount of stress they are exposed to before and during planting. Minimizing planting stress is the goal of proper planting. Trees and shrubs should also be thoroughly watered prior to planting to minimize water stress.

Ideally, soil preparation should be carried out well ahead of planting. Preparation could include incorporating organic matter into the soil to improve aeration, assist drainage of compacted soils and improve soil nutrient-holding capacity. Specific preparation may be needed if the soil has an inappropriate pH or is lacking in certain elements. Trees and shrubs with a limited soil tolerance range may require very specific soil preparation to meet their requirements.

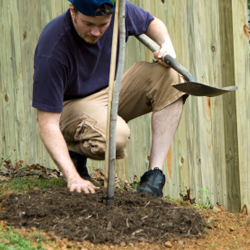
Additional soil preparation is essential when you are ready to plant trees and shrubs. Dig the planting hole 50 percent wider but only as deep as the root ball. Prepare soil by mixing one-third existing soil, one-third organic matter and one-third topsoil.

Planting Container-Grown Trees & Shrubs

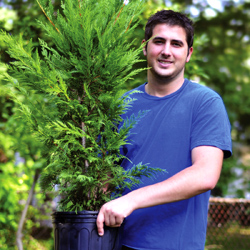
When you buy a plant from a garden center or nursery, it often comes in a small pot that holds the roots. Remove the plant from that container gently, but without pulling on delicate stems or foliage. Squeezing the container all around can help loosen the root ball so it slides out more easily, or the container may be thin enough to cut away.

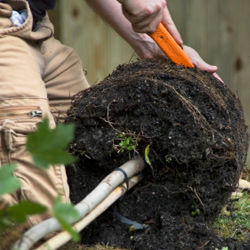
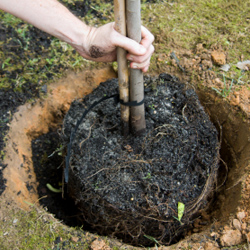
Because the plant was grown in a container, its roots have been restricted by the shape of the container. Loosen the roots all the way around, even on the bottom. If the root system is too tight to loosen with your fingers, cut through roots slightly with a knife or pruning sheers. Make three or four one-inch deep cuts, then gently pull the roots apart.

Center the plant in the prepared hole, keeping it 1-3 inches above grade. Keep roots spread out.

Planting Field-Grown Trees & Shrubs

If you are transplanting a tree or shrub that has been field grown, it may have bare roots or be lightly bagged or burlapped. Center the plant in the prepared hole 1-3 inches above the grade. Cut and remove all cords or twine from the root ball and trunk. Burlap should be left on, but loosened and pulled away from the trunk and below the soil surface. Remember to move trees carefully. Roll the root ball on its side and “steer” it into the hole with the trunk. Straighten the tree upright in the hole, checking it from different angles to be sure it is fully upright.

Completing the Planting

For both container-grown and balled and burlapped plant material, backfill the planting hole with soil your mix and pack firmly. Make a rim of soil around the plant to act as a “saucer” for holding water.

Water thoroughly with a slow soaking, and use a root stimulator fertilizer to provide good initial stimulus for the roots to spread out.

Apply a 2-inch layer of mulch around your new planting, keeping an open space of 3 inches around the trunk or base of the plant to allow for air circulation.

Staking Container & Field Grown Trees and Shrubs

When larger trees or shrubs are planted, they are not yet firmly established in their new locations and may tip or lean as the soil settles. For larger trees, use three wires secured to anchor stakes in firm ground (never into the root ball). Where the wires touch the tree, they should be covered with rubber hose to prevent damage. Remove stakes as soon as roots become established. This can be as soon as a few months, so check your tree frequently. Stakes should not be left in place any longer than one growing season.

New Plant Care

All newly planted trees and shrubs need gentle care as they settle in to their new locations. To keep them healthy and encourage good initial growth…

  • Water Properly
    Plants should be slowly soaked to a depth of 4 inches, which is the equivalent of about an inch of water per week. This is necessary during the first year or two. Let the hose run slowly at the base of the plant until the water has penetrated to the root depth. Too much water can also be a problem. Feel the soil. If it is soggy or squishy, do not add water. Frequent light watering is not as good as a thorough soaking once per week, which will encourage strong root growth.
  • Fertilize Appropriately
    Your new plants should be given a Root Stimulator type fertilizer right after planting. You should not use a fertilizer meant for mature plants on new material, as it could cause damage to your plant. It is essential for new plants to develop a healthy root system – top growth will follow. After the first season, regular fertilizers can be used.
  • Prune Safely
    Pruning at planting time may be necessary for larger trees to reduce leaf surface to match cut roots. Remove one-third of smaller twigs. Do not cut back the main trunk or larger branches. If shaping is necessary, trim side branches enough to get uniformity.
  • Be Alert for Insects and Diseases
    Keep an eye out for holes or brown leaves or needles. This could be a sign of insect or disease problems. Ask our staff for help identifying the insect or disease and to prescribe appropriate treatments.
  • Special Care Plants
    Some plants need extra special care because of their finicky needs. For example, azaleas, hollies, rhododendrons and dogwoods all need well-drained, acidic soils, high in organic matter and a shady location. Research the trees and shrubs you are planting to be sure you are meeting their needs right from the beginning.

It can seem intimidating to plant your own trees and shrubs, since they are an investment in your landscape that you hope to enjoy for many years. By understanding planting basics, however, you can easily give every plant a great start in its new home.

Time to PlantTime to Plant

Time to Plant

Time to Plant